5 Simple Steps to Remove Bathroom Sink Stopper
If you’ve ever tried to Remove Bathroom Sink Stopper and found yourself frustrated or unsure where to start, you’re not alone. Many people struggle with this common maintenance task, wishing there was a simpler way to get the job done without damaging their sink or plumbing. Luckily, understanding the process and having the right tools can make all the difference.
First, identify your sink stopper type—lift-and-turn, push-and-pull, toe-touch, or pop-up—as removal methods vary.
Next, gather tools like adjustable pliers and a flathead screwdriver, protecting finishes with cloth or tape.
Then, Remove Bathroom Sink Stopper by locating the pivot rod, twisting the stopper gently, and pulling it out.
Disconnect the pivot rod and lift mechanism by loosening the retaining nut.
Finally, clean or replace the stopper, ensuring it moves smoothly.
Keep going to uncover helpful tips for easier maintenance.
Key Takeaways
- Identify your sink stopper type to determine the appropriate removal method, such as lift-and-turn or pop-up designs.
- Gather essential tools like adjustable pliers and a flathead screwdriver before starting the removal process.
- Locate and gently pull the stopper upward, twisting slightly to release it from the drain shaft hole.
- Loosen the pivot rod’s retaining nut beneath the sink and carefully disconnect the pivot rod and lift mechanism.
- Clean the stopper thoroughly or replace it if damaged, then reinstall and test for proper movement and sealing.
Identify Your Sink Stopper

Before you can remove your bathroom sink stopper, you need to identify what type you have. Sink stoppers come in several design variations, including lift-and-turn, push-and-pull, toe-touch, and pop-up styles. Each design requires a slightly different removal approach, so knowing which stopper you’re dealing with saves time and frustration.
Common issues with stoppers often stem from dirt buildup, corrosion, or broken linkage mechanisms. These problems can affect how easily the stopper moves or comes out. For example, lift-and-turn stoppers usually have a visible knob you twist, while pop-up stoppers connect to a lever under the sink. Push-and-pull and toe-touch stoppers rely on simple up-and-down motion but might be stuck due to grime.
Identifying your stopper type helps you anticipate these common issues and decide whether you can remove it manually or if you’ll need to loosen screws or disconnect linkages before pulling it out.
Gather Tools for Remove Bathroom Sink Stopper
Knowing the type of sink stopper you have helps determine which tools you’ll need to remove it effectively. Different decorative styles and material types may require specific tools to avoid damage. For example, a metal stopper with intricate decorative styles might need a soft cloth or rubber grip to prevent scratching, while plastic stoppers usually call for basic tools like pliers.
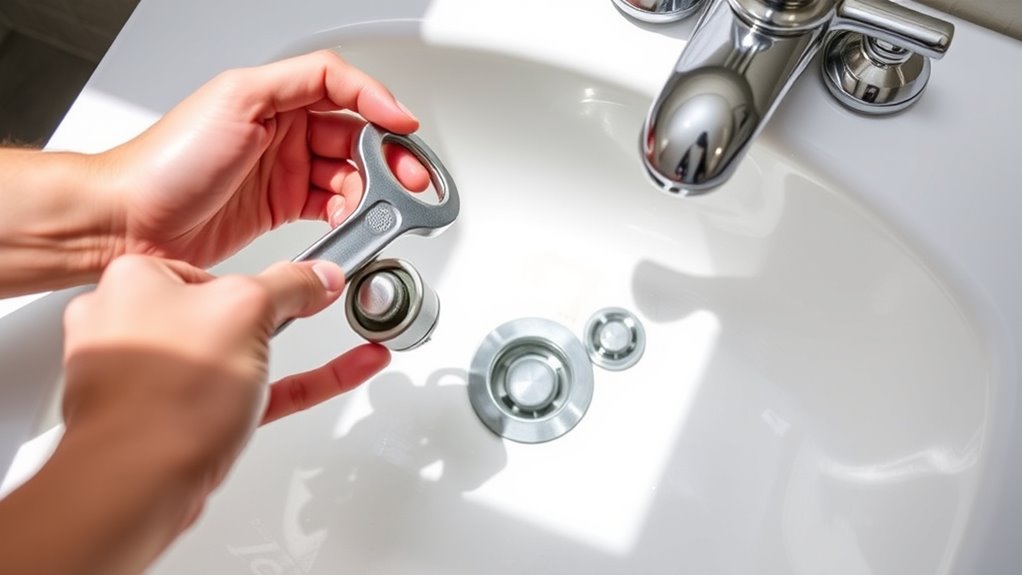
Start by gathering a pair of adjustable pliers and a flathead screwdriver. These are versatile for most stopper types. If your stopper uses a pop-up mechanism, you might also need a wrench or a hex key to loosen hidden screws. For stoppers with decorative finishes, use a cloth or painter’s tape to protect the surface while gripping.
Having these tools ready ensures you can handle various material types safely and efficiently. Being prepared will save you time and prevent damage during the removal process. Keep everything within reach before you begin.
Remove the Sink Stopper
Start by locating the pivot rod under the sink, which controls the stopper mechanism. Removing the sink stopper is a simple step that helps maintain your bathroom decor and promotes water conservation by preventing leaks.
Locate the pivot rod under the sink to remove the stopper, enhancing decor and conserving water by preventing leaks.
Follow these steps to remove the stopper:
- Look inside the sink drain for a small hole or slot on the stopper’s shaft.
- Grasp the stopper from above and gently pull it upward while twisting slightly.
- If the stopper resists, adjust the pivot rod underneath to release tension.
- Once free, lift the stopper out completely, inspecting it for buildup or damage.
Removing the stopper allows you to clean or replace it, ensuring your sink functions efficiently and complements your bathroom decor. Keeping the stopper in good condition also helps avoid water waste, supporting water conservation efforts.
This straightforward task prepares you for the next step, disconnecting the pivot rod and lift mechanism.
Disconnect the Pivot Rod and Lift Mechanism
Once you’ve removed the stopper, you can disconnect the pivot rod and lift mechanism to fully free the assembly. First, locate the pivot rod underneath the sink; it connects to the lift mechanism inside the drain pipe.
Loosen the retaining nut by hand to release the pivot rod. Carefully pull it out to avoid disturbing pipe alignment, which can cause water leakage. Keep an eye on the lift strap connected to the rod, as it controls the stopper’s movement.
Here’s a quick guide to help you:
| Step | Tip |
|---|---|
| Locate pivot rod | Under sink, attached to drain |
| Loosen retaining nut | Turn counterclockwise by hand |
| Remove pivot rod | Pull gently, avoid misalignment |
| Check lift mechanism | Detach lift strap if needed |
Disconnecting these parts guarantees you can clean or replace the stopper without risking leaks or damaging pipes.
Clean or Replace the Stopper
After you disconnect the pivot rod and lift mechanism, you’ll have clear access to the stopper itself. Now is the perfect time for stopper maintenance or stopper troubleshooting. Start by examining the stopper for buildup or damage. You can either clean it or replace it if necessary.
Here’s how to proceed:
- Remove any hair, soap scum, or debris from the stopper using a brush or cloth.
- Soak the stopper in warm, soapy water to loosen stubborn grime.
- Inspect the stopper for cracks or wear; if it’s damaged, consider purchasing a replacement.
- Reinstall the stopper and test the mechanism to ensure it moves freely and seals properly.
Regular stopper maintenance prevents clogs and keeps your sink draining smoothly. If you notice persistent issues during stopper troubleshooting, replacing the stopper can save you time and effort in the long run.
Frequently Asked Questions
How Often Should I Clean My Bathroom Sink Stopper?
You should clean your bathroom sink stopper at least once a month to keep things running smoothly. Regular sink cleaning helps prevent buildup of hair and soap scum, which can cause clogs and odors.
Stopper maintenance is essential to avoid slow drainage and maintain hygiene. If you notice water draining slowly or smell unpleasant odors, clean it more often.
Staying consistent with this routine saves you from bigger plumbing headaches later.
Can a Clogged Stopper Cause Sink Odors?
Yes, a clogged stopper can definitely cause sink odors because trapped debris and hair create a breeding ground for bacteria. To keep your bathroom fresh, focus on regular drain maintenance by cleaning the stopper and pipes.
This prevents buildup and blocks unpleasant smells from escaping. By staying on top of odor prevention with simple upkeep, you’ll avoid stinky sinks and maintain a cleaner, healthier bathroom environment.
Are There Eco-Friendly Products to Maintain Sink Stoppers?
Absolutely, you can keep your sink stopper happily fresh with eco-friendly cleaning options. Natural maintenance products like baking soda, vinegar, and lemon juice work wonders without harsh chemicals.
These gentle ingredients dissolve buildup and neutralize odors while being kind to the environment. You’ll enjoy a cleaner sink and peace of mind, knowing you’re supporting a healthier planet.
Just mix, pour, and rinse regularly to keep things flowing smoothly and naturally.
What to Do if the Stopper Is Broken Beyond Repair?
If your stopper is broken beyond repair, you’ll need to focus on stopper replacement. First, remove the damaged stopper carefully, then measure its size to find a matching replacement.
While some repair techniques might fix minor issues, a completely broken stopper usually calls for a new one. Installing a new stopper guarantees proper function and prevents leaks. Don’t forget to check the linkage and clean the drain area before fitting the replacement.
How to Prevent Hair From Clogging the Stopper?
You don’t want hair debris clogging your stopper mechanism like a traffic jam on a Monday morning! To prevent this, use a hair catcher or mesh screen over the drain. It traps hair before it reaches the stopper.
Clean it regularly to avoid buildup. Also, run hot water after each use to flush away loose strands. These simple habits keep your stopper mechanism working smoothly and save you from a nasty clog disaster.
Conclusion
Now that you’ve mastered these five simple steps, removing your bathroom sink stopper will feel like a breeze, even easier than snapping your fingers! With the right tools and a bit of patience, you can tackle this task without any stress.
Whether you’re cleaning or replacing the stopper, you’ll save time and avoid costly repairs. So go ahead, take control of your sink and enjoy the satisfaction of a job well done removing your bathroom sink stopper!