10 Essential Steps to Paint Your Home’s Exterior
Painting your home’s exterior can feel overwhelming, especially if you’re unsure where to start or worried about making mistakes. You’re not alone—many people struggle with choosing the right materials and techniques to achieve a lasting, beautiful finish. But with a clear plan and the right approach, you can transform your house’s look with confidence.
To paint your home’s exterior, start by thoroughly cleaning and repairing walls, then protect surrounding plants and surfaces. Gather quality tools and wear safety gear. Prime surfaces for better paint adherence, and choose paint suited for your climate and style.
Apply paint evenly using the right techniques, working in thin, multiple coats.
Finally, maintain your paint job with regular cleaning and touch-ups. Follow these steps closely, and you’ll create a beautiful, lasting finish with confidence.
Key Takeaways
- Thoroughly clean and repair exterior walls, making sure surfaces are dry and smooth before painting.
- Protect surrounding plants, furniture, and hardscapes by using drop cloths and barriers.
- Choose the right primer and paint type based on the surface material and local climate conditions.
- Apply paint evenly with proper tools. Use multiple thin coats and allow adequate drying time between each.
- Maintain painted surfaces by regular cleaning, prompt touch-ups, and applying protective sealants.
Prepare Your Exterior Walls for Painting
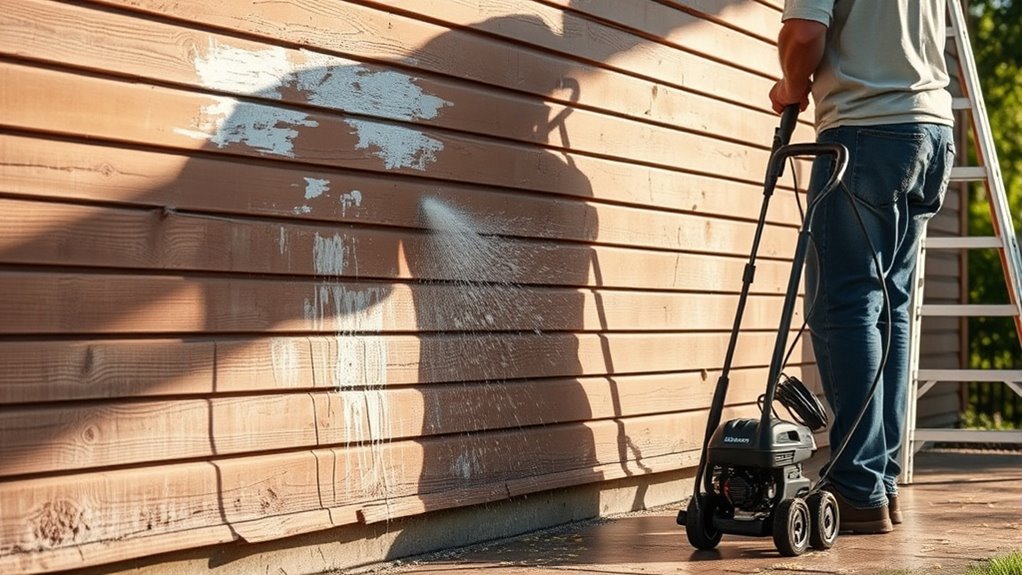
Before you begin painting, make sure to thoroughly clean your exterior walls. Dirt, mildew, and debris can prevent paint from adhering properly, so wash the surfaces with a pressure washer or scrub with a mild detergent solution.
As you prepare, keep color matching in mind. Selecting a shade that complements your home’s existing features ensures a cohesive look.
Also, pay attention to weather considerations. Avoid painting on rainy or extremely humid days, as moisture can affect drying times and the final finish. Ideally, choose a stretch of dry days with moderate temperatures to achieve the best results.
Preparing your walls well sets the stage for a smooth painting process and long-lasting beauty. By cleaning carefully and factoring in color matching and weather conditions, you’ll save time and avoid issues down the line, making your exterior painting project more successful from the start.
Repair Cracks and Damages Before Painting
Once your walls are clean and dry, check carefully for cracks, holes, or other damages that could affect the paint’s adhesion and appearance. Start with a thorough structural assessment to identify any underlying issues before you begin crack repair.
Small cracks can be filled with exterior-grade filler, but larger damages might need professional attention. Fixing these flaws guarantees your paint job lasts longer and looks flawless.
Here’s a quick guide to the emotional impact of neglecting repairs:
| Feeling | Cause | Result |
|---|---|---|
| Frustration | Peeling paint from cracks | Frequent repainting needed |
| Anxiety | Hidden structural issues | Safety concerns |
| Pride | Smooth, flawless walls | Enhanced curb appeal |
| Confidence | Proper crack repair | Long-lasting paint job |
| Satisfaction | Completed structural assessment | Peace of mind |
Taking time now conserves your frustration and keeps your home beautiful for years.
Get Your Tools and Safety Gear Ready
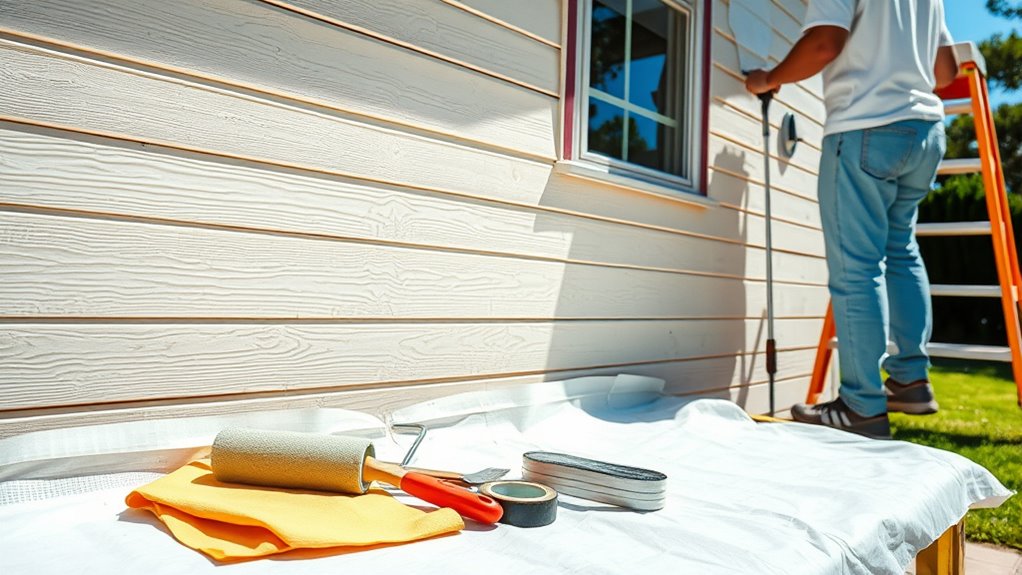
Although preparing your walls is essential, gathering the right tools and safety gear guarantees you can work efficiently and protect yourself throughout the painting process. Start by assembling brushes, rollers, paint trays, ladders, and drop cloths. Make sure every tool is clean and in good condition. Tool maintenance helps prevent delays and ensures smooth application.
Next, prioritize safety precautions. Wear protective gloves, safety goggles, and a mask to shield yourself from fumes and debris. If you’re working on a ladder, check its stability and never overreach. Consider using knee pads if you’ll be crouching for extended periods.
Clean and Prime Surfaces for Better Paint Adhesion
Before you start painting, make sure to give your home’s exterior a good, thorough cleaning. You want to get rid of all the dirt, mildew, and any loose paint hanging around.
Now, using the right primer is super important. It helps the paint stick better and makes it last longer.
Surface Cleaning Techniques
Because paint adheres best to clean, dry surfaces, you’ll want to thoroughly remove dirt, mildew, and loose paint before you begin. Start by using a stiff-bristled brush to scrub away debris and mildew from the exterior walls.
Brush techniques matter. Use firm, circular motions to reach crevices and corners. For stubborn dirt, a pressure washer set to a low setting can be helpful, but avoid damaging the surface. After washing, allow the walls to dry completely.
Next, scrape off any peeling or flaking paint with a putty knife or scraper to guarantee a smooth base. Finally, sweep away all dust and debris removal remnants to prevent imperfections. Proper surface cleaning sets the stage for strong paint adhesion and a long-lasting finish.
Importance of Primer Use
Once your surfaces are clean and dry, applying a primer boosts paint adhesion and durability. Understanding primer importance is key to achieving a long-lasting exterior finish. Primer creates a uniform base that helps paint stick better, preventing peeling and chipping over time.
It also seals porous surfaces, which improves surface adhesion and guarantees even color coverage. Skipping this step can lead to premature paint failure, costing you time and money on repairs.
When you choose the right primer for your surface type, like wood, metal, or masonry, you improve the overall look and lifespan of your paint job. Remember, investing effort in priming now saves you from headaches later.
Choose the Best Exterior Paint Type
When selecting paint for your home’s exterior, you need to consider durability, finish, and climate compatibility to ensure long-lasting results. Different exterior paint types offer various color options and finishes, so understanding these can help you make the best choice.
Acrylic latex paints are popular for their durability and flexibility. Oil-based paints provide a smooth finish but require longer drying times.
Here’s a quick comparison:
| Paint Type | Key Features |
|---|---|
| Acrylic Latex | Durable, weather-resistant, quick drying |
| Oil-Based | Smooth finish, excellent adhesion, longer drying |
| Elastomeric | Flexible, seals cracks, ideal for harsh climates |
Think about your local climate and the surface you’ll paint. Acrylic latex suits most conditions, while elastomeric is perfect for areas with extreme weather. Choosing the right exterior paint type ensures your home looks great and stays protected for years.
Select Exterior Paint Colors to Boost Curb Appeal
You’ll want to pick colors that not only make your home stand out but also reflect the mood you want to set. Think about your home’s style and how different shades will complement its architecture. And don’t forget to take into account the surrounding landscape and neighborhood to create a harmonious look.
Understanding Color Psychology
Although choosing a paint color might seem purely aesthetic, understanding color psychology can substantially improve your home’s curb appeal. When you grasp how colors evoke emotions, you can make smarter choices that resonate with viewers.
For example, warm colors like reds and oranges create energy and excitement, while cool blues and greens promote calmness and trust. Achieving color harmony is key; pairing complementary colors guarantees your exterior feels balanced and inviting.
You want visitors to experience a positive emotional impact the moment they see your home. By considering how colors influence mood, you’ll pick shades that not only look great but also create the right atmosphere. This thoughtful approach helps your house stand out while making a welcoming statement.
Considering Architectural Style
Selecting the right exterior paint colors hinges on your home’s architectural style. You want to achieve architectural harmony by choosing colors that complement the design elements, whether it’s Colonial, Victorian, or Modern. Each style has a palette that enhances its unique features without overpowering them.
For older homes, maintaining historical accuracy is essential; it preserves the character and increases curb appeal. Research period-appropriate colors or consult restoration guides to pick shades that honor your home’s heritage.
For contemporary styles, feel free to experiment but stay true to the lines and materials used. By aligning your color choices with architectural style, you guarantee your home looks cohesive, attractive, and well-maintained, boosting its overall charm and value.
Coordinating With Surroundings
How can your home’s exterior paint colors improve its natural setting? By choosing shades that promote landscape harmony, you create a seamless shift between your home and its environment. Focus on color blending to complement nearby trees, shrubs, and flowers rather than clash with them.
This approach improves curb appeal and makes your home feel like part of the landscape.
Use this quick guide to coordinate your paint colors effectively:
| Surrounding Element | Suggested Paint Strategy |
|---|---|
| Greenery | Earthy tones like olive, tan |
| Flowers | Soft neutrals or muted pastels |
| Natural stone | Warm grays or sandy beige |
Selecting colors this way helps your exterior blend naturally, boosting beauty and value effortlessly.
Protect Surrounding Areas Before You Paint
Before you start painting, take the time to protect the areas around your home to avoid unwanted splatters and damage. Properly shielding your landscaping and belongings saves you from extra cleanup and costly repairs later.
Protect your home’s surroundings before painting to prevent splatters, damage, and costly cleanup later.
Use landscaping barriers to safeguard plants, flower beds, and shrubs near your work area. Lay down protective coverings like drop cloths or plastic sheeting over walkways, patios, and outdoor furniture.
Here’s how to effectively protect your surroundings:
- Install landscaping barriers around delicate plants and garden features.
- Cover hardscapes and furniture with durable protective coverings.
- Tape off windows, doors, and trim to prevent paint seeping.
- Remove or relocate movable items to a safe distance.
Taking these precautions ensures a clean, professional-looking paint job without compromising your home’s exterior beauty or your outdoor space.
Apply Paint Using Proper Techniques for Even Coverage
Once your surroundings are well protected, you can focus on applying paint with techniques that guarantee a smooth, even finish. Start by checking the paint consistency; it should be smooth and easy to spread, not too thick or watery.
If needed, thin it slightly according to the manufacturer’s instructions to avoid drips and uneven layers. Use proper brush techniques: load your brush evenly, tapping off excess paint to prevent clumps.
Apply the paint using long, even strokes, working in small sections to maintain a wet edge and avoid lap marks. For detailed areas, use a smaller brush and gentle strokes to reach corners and trim without overloading the surface.
Always brush in the direction of the wood grain or siding texture for a natural finish. Taking your time with these steps ensures even coverage, reduces streaks, and helps the paint adhere properly for a professional-looking exterior.
Apply Multiple Coats for a Durable Finish
You’ll want to apply multiple coats to make sure your paint lasts and holds up against the elements. Just be sure to let each layer dry completely before you add the next one. This helps avoid peeling or uneven texture. Taking this extra time will give your home a smooth, durable finish that looks great for years to come.
Importance Of Multiple Layers
Applying multiple layers of paint is essential to achieving a durable and long-lasting finish on your home’s exterior. Each layer builds upon the last, enhancing paint texture and boosting weather resistance. Skipping layers can leave your surface vulnerable to peeling, cracking, and fading.
When you apply multiple coats, you create a smoother, more even paint texture. You also increase protection against harsh weather conditions. Plus, it strengthens adhesion to the surface for longer durability and improves overall appearance with richer color depth.
Drying Time Between Coats
How long should you wait before adding another coat of paint? Typically, you’ll want to wait at least 4 to 6 hours, but drying time depends heavily on the drying environment.
High humidity or low temperatures slow drying, so adjust your schedule accordingly. Proper brush techniques also affect drying; use smooth, even strokes to avoid thick layers that take longer to dry.
Applying thin coats ensures quicker drying and better adhesion. Always check the paint manufacturer’s instructions for specific wait times. If you rush, you risk peeling or uneven surfaces.
Patience pays off. Allow each coat to dry fully before applying the next to build a durable, long-lasting finish that protects your home beautifully.
Maintain Your Exterior Paint for Long-Lasting Beauty
Although a fresh coat of paint can transform your home’s exterior, maintaining it properly guarantees that beauty lasts for years. To keep your paint looking vibrant, you need to address issues early and preserve the integrity of the color matching and paint texture.
Here’s how to maintain your exterior paint effectively:
Regularly clean surfaces with mild detergent to remove dirt and mildew. Inspect for cracks or peeling paint and touch up immediately using the original color matching. Trim plants and bushes away from walls to prevent moisture buildup that damages paint texture. Apply a protective sealant every few years to shield against weather damage.
Frequently Asked Questions
How Long Does Exterior Paint Typically Take to Dry?
Exterior paint drying time usually takes about 1 to 4 hours to feel dry to the touch, but you shouldn’t rush. The exterior paint cure, which means the paint fully hardens and bonds, can take up to 30 days depending on the type of paint, weather, and humidity.
You’ll want to prevent heavy rain or extreme temperatures during this period to guarantee a durable, long-lasting finish on your home’s exterior.
Can I Paint My Exterior Walls in Cold Weather?
You can paint your exterior walls in cold weather, but you need to be cautious with weather considerations. Paint won’t dry properly if temperatures drop below 50°F, so check the forecast before starting.
Proper paint preparation is vital. Choose a cold-weather formula designed to cure at lower temperatures. Also, avoid painting when rain or frost is expected.
Taking these steps helps guarantee your paint job lasts and looks great despite chilly conditions.
What Is the Average Cost of Painting a Home’s Exterior?
Painting your place typically takes a cost estimate between $1,800 and $4,000, depending on size and surface specifics. When budgeting, you’ll want to plan for paint, prep work, and professional labor.
Smart budget planning saves stress and surprises. By securing a solid cost estimate upfront, you can set realistic expectations and guarantee your exterior gets that fresh, flawless finish without financial frustration.
How Do I Choose Between Brush, Roller, or Spray Painting?
You choose between brush, roller, or spray painting based on your surface preparation and desired paint finish. Use a brush for detailed areas or trim where precision matters.
Rollers work best on flat, large surfaces, giving you an even finish quickly. Spray painting covers uneven or textured surfaces efficiently, but requires thorough surface preparation to avoid drips.
Consider your project’s size and finish goals to pick the right tool.
Are There Eco-Friendly Exterior Paint Options Available?
When Sarah painted her cottage, she chose eco-friendly paints made from natural ingredients, proving sustainable coating options really work. You can find similar paints that reduce harmful emissions and use fewer volatile organic compounds (VOCs).
These eco-friendly paints not only protect your home but also the environment. So, if you want a greener choice, look for brands labeled as low-VOC or zero-VOC for a safe, sustainable finish you’ll feel good about.
Conclusion
By following these essential steps, you’ll have your home’s exterior looking sharp in no time. Remember, preparation is half the battle, so don’t rush through it.
With the right tools, quality paint, and a steady hand, you’ll create a finish that stands the test of time. Keep up with maintenance, and your home will shine bright like a diamond for years to come.
So roll up your sleeves and get started. You’ve got this, and with these 10 essential steps to paint your home’s exterior, success is within reach!