Essential Guide to Cleaning Kitchen Appliances Effectively
Keeping your kitchen appliances clean can feel like a never-ending chore, right? You’re not alone—many people struggle with finding the right way to maintain their gadgets without spending hours scrubbing or using harsh chemicals.
If you want to keep your appliances running smoothly and looking great, it helps to have effective cleaning tips that actually work.
To clean kitchen appliances effectively, use microfiber cloths, gentle cleaners, and small brushes for tight spots. Regularly wipe seals, filters, and vents to avoid buildup that reduces efficiency and shortens lifespan. Deep clean ovens with baking soda and vinegar and sanitize refrigerators to keep food fresh.
Don’t forget descaling coffee makers and running dishwasher cleaning cycles monthly. Consistent care prevents odors, saves energy, and helps spot issues early. Keep going if you want easy tips to master each appliance’s upkeep.
Key Takeaways
- Regularly clean and maintain appliances to improve efficiency, prevent odors, and extend their lifespan.
- Use appropriate tools like microfiber cloths, degreasers, and small brushes for safe, thorough cleaning.
- Deep clean major appliances by removing parts, applying natural solutions like baking soda and vinegar, and ventilating properly.
- Perform routine dishwasher maintenance, including filter cleaning, descaling, and leaving the door open to avoid odors.
- Clean small appliances and filters monthly, descale coffee makers regularly, and wipe exteriors to prevent buildup and damage.
Why Keeping Your Appliances Clean Helps Them Work Better
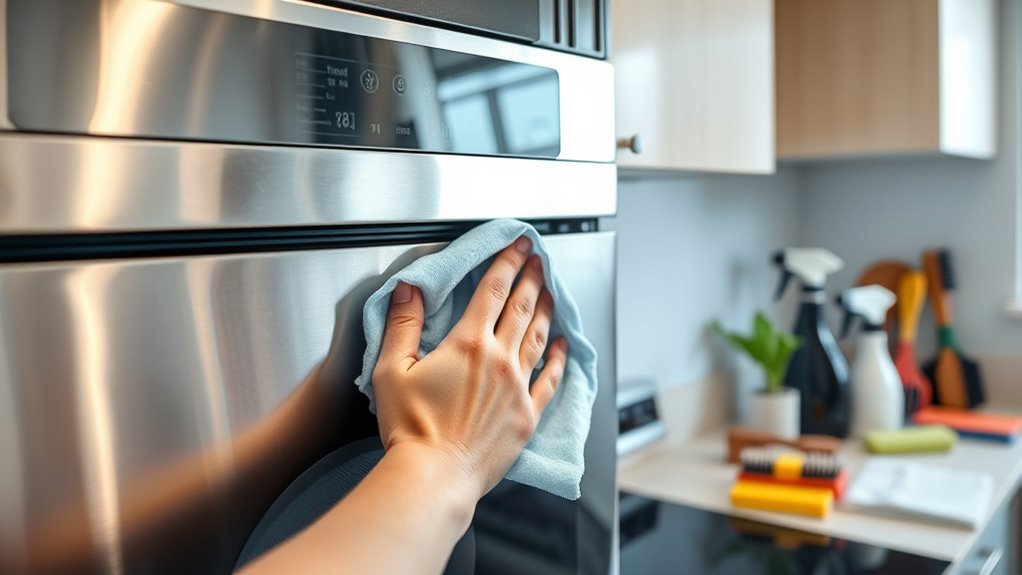
Although it might seem like a small task, keeping your kitchen appliances clean directly improves their performance. When you clean your appliances regularly, you prevent buildup that can cause them to work harder than necessary. This not only keeps them running smoothly but also extends their appliance durability.
Dirt, grease, and food particles can clog vents, filters, and other essential parts, reducing efficiency and increasing energy consumption. Maintaining a consistent cleaning frequency helps you spot issues early, avoiding costly repairs or replacements.
For example, wiping down your microwave and oven after each use prevents grime accumulation, while monthly deep cleans keep refrigerators and dishwashers in top shape. By making cleaning a routine, you guarantee your appliances don’t just look good but function efficiently.
In turn, this saves you money and hassle, making your kitchen a more effective and enjoyable space to work in.
How to Gather the Right Supplies for Kitchen Appliance Cleaning
Keeping your kitchen appliances running smoothly depends not only on regular cleaning but also on having the right supplies at hand. Gathering these essentials helps you tackle kitchen clutter and maintain your appliances efficiently. This ultimately extends their lifespan. Here’s a quick checklist to get you started:
Proper supplies and regular cleaning are key to maintaining kitchen appliances and extending their lifespan.
- Microfiber Cloths & Sponges – Use these for gentle yet effective cleaning without scratching surfaces or leaving lint behind.
- Multipurpose Cleaner & Degreaser – Choose products that cut through grease and grime but are safe for appliance finishes.
- Small Brushes & Toothpicks – Perfect for reaching tight spots and removing debris from buttons, vents, and crevices.
How to Clean Your Oven: Remove Grease and Burnt Spots
First, you’ll want to start by tackling the grease with a strong but safe degreaser. This helps break down that stubborn buildup without damaging your oven. After that, move on to the burnt spots. Just make a simple paste with baking soda and water, apply it, and let it sit for a while. Once it’s had time to work, scrub gently to lift those marks away. Doing it this way not only makes your oven look cleaner but also helps it work better in the long run.
Effective Degreasing Techniques
When grease and burnt spots build up in your oven, they can become stubborn and difficult to remove. Tackling kitchen grease requires effective degreasing solutions and the right techniques. Here are three steps to get you started:
- Choose the Right Degreaser: Use a commercial degreasing solution or a homemade mix of baking soda and vinegar to break down tough grease.
- Apply Generously: Spray or spread the solution evenly on greasy areas, allowing it to sit for at least 15 minutes to loosen grime.
- Scrub and Wipe: Use a non-abrasive scrubber to avoid damage while removing grease. Finish by wiping with a damp cloth to clear residue.
Following these steps helps you maintain a cleaner oven without harsh chemicals or excessive scrubbing.
Removing Burnt Residue
How do you tackle burnt residue that stubbornly clings to your oven surfaces? Start by mixing baking soda and water into a thick paste, then spread it over the affected areas. Let it sit for at least 30 minutes to loosen the burnt residue.
Next, spray vinegar over the paste. This fizzing action helps with burnt residue removal. After the fizzing stops, wipe away the mixture with a damp cloth.
For tougher spots, use a plastic scraper gently to avoid damaging your oven’s surface. Remember, regular cleaning grease buildup prevents stubborn burnt spots from forming.
Don’t forget to wear gloves to protect your hands and ventilate your kitchen while cleaning. With these steps, you’ll keep your oven spotless and extend its lifespan efficiently.
How to Deep Clean Your Refrigerator for Food Safety
First, go ahead and take everything out of your refrigerator. This way, you can check for any expired or spoiled items that need to be tossed. After that, remove the shelves and drawers so you can give them a good scrubbing with warm, soapy water. Once those are clean and dry, it’s time to wipe down and sanitize all the interior surfaces. Doing this helps keep your food safe and fresh for longer.
Remove All Food Items
Why should you remove all food items before deep cleaning your refrigerator? Food removal is essential for effective appliance sanitation. Clearing out everything ensures you can clean every surface thoroughly and prevents food contamination during the process.
Here’s why you should remove all food items first:
- Check expiration dates. Toss expired or spoiled food to avoid bad odors and bacteria growth.
- Prevent cross-contamination. Removing food stops germs from spreading while you clean.
- Access all areas. You can reach every corner, including hidden spots behind items, for a complete clean.
Clean Shelves And Drawers
Where do you start when tackling the shelves and drawers of your refrigerator? Begin by removing all shelves and drawers carefully. Wash them with warm, soapy water, scrubbing any stains or spills to ensure thorough cleaning. Rinse and dry them completely before putting them back.
While everything’s out, take the opportunity to reassess your shelf organization. Arrange items logically, grouping similar foods together for easy access and better air circulation. Consider drawer labeling to keep things neat and help everyone in the household know where things belong.
Labeling also encourages maintaining cleanliness over time. Once clean and dry, replace the shelves and drawers in their designated spots. This step not only improves hygiene but also makes your refrigerator more functional and visually organized.
Sanitize Refrigerator Surfaces
How often do you think about the cleanliness of your refrigerator’s interior surfaces? Proper surface sterilization is essential for food safety and preventing bacterial growth.
To sanitize your fridge effectively, follow these cleaning techniques:
- Empty the fridge and remove shelves and drawers for separate washing with warm, soapy water.
- Use a solution of one tablespoon of bleach mixed with a gallon of water to wipe down all interior surfaces, ensuring thorough surface sterilization.
- Rinse with clean water and dry everything completely before replacing the shelves and food items.
How to Refresh and Clean Your Microwave Inside and Out
Although microwaves make reheating food quick and easy, they can quickly accumulate splatters and odors that affect their performance and hygiene. To refresh and clean your microwave inside and out, start by unplugging it for microwave safety.
Fill a microwave-safe bowl with water and a few slices of lemon or a tablespoon of vinegar. Heat it on high for 3-5 minutes to loosen stains and neutralize odors. Carefully remove the bowl and wipe the interior with a damp cloth or sponge, focusing on stain removal. For tough spots, use a baking soda paste to scrub gently.
Don’t forget to clean the turntable and exterior surfaces. Use a mild detergent or all-purpose cleaner on the outside, avoiding abrasive materials that can damage the finish. Dry thoroughly before plugging it back in.
Regular cleaning keeps your microwave safe, fresh, and functioning well, ensuring your meals taste just right every time.
How to Maintain Dishwasher Cleanliness and Efficiency
To keep your dishwasher running smoothly, start by removing any food residue trapped inside. It’s a good idea to check for bits of food after each cycle to avoid clogs. You’ll also want to descale and deodorize it regularly—this helps prevent buildup and keeps odors at bay. Just a little routine maintenance can go a long way. Following these simple tips can really boost your dishwasher’s efficiency and help it last longer.
Removing Food Residue
Where does all that food residue hide in your dishwasher? It often settles in tricky spots, affecting performance and causing stains. To tackle food debris and guarantee stain removal, follow these steps:
- Clean the filter: Remove and rinse the dishwasher filter to clear trapped food particles.
- Scrub the spray arms: Check the spray arms for clogged holes and clean them with a toothpick or brush.
- Wipe door seals and edges: These areas accumulate grime and food debris, so wipe them thoroughly with a damp cloth.
Descaling And Deodorizing
After clearing out food residue, you’ll want to focus on descaling and deodorizing to keep your dishwasher running smoothly and smelling fresh. The descaling process removes mineral buildup, especially if you have hard water.
Run a cycle with a dishwasher-safe descaling agent or a cup of white vinegar placed on the top rack. This breaks down limescale and improves efficiency. For deodorizing methods, sprinkle baking soda on the bottom of the dishwasher and run a short hot water cycle. This neutralizes odors without harsh chemicals.
You can also leave the door slightly open after use to let moisture escape, preventing musty smells. Regularly applying these descaling and deodorizing methods guarantees your dishwasher stays clean, efficient, and odor-free.
Regular Maintenance Tips
Although descaling and deodorizing tackle specific issues, maintaining your dishwasher’s cleanliness and efficiency requires consistent, simple habits. To keep your appliance running smoothly, follow these essential tips:
- Regularly check and clean appliance accessories like filters and spray arms to prevent clogs and guarantee ideal water flow.
- Stick to a cleaning schedule. Wipe down seals and door edges weekly to avoid buildup and unpleasant odors.
- Run an empty cycle with a dishwasher cleaner monthly to remove grease and mineral deposits that affect performance.
How to Keep Your Coffee Maker Free From Build-Up and Odors
Because coffee makers handle hot water and coffee oils daily, they can quickly develop build-up and odors that affect taste. To keep your coffee maker performing well, regular maintenance is essential. Start by descaling your machine every month using a mixture of equal parts water and white vinegar.
Run this solution through a brewing cycle, then follow with two cycles of clean water to rinse thoroughly. This process removes mineral deposits and coffee residue that cause build-up and unpleasant smells.
For odor elimination between deep cleans, wipe down the carafe, filter basket, and exterior with a damp cloth after each use. Don’t forget to clean the removable parts in warm, soapy water weekly.
Also, leaving the machine open when not in use helps air it out and prevents stale odors. By sticking to these simple steps, you’ll enjoy fresh-tasting coffee while extending your coffee maker’s lifespan.
Easy Tricks to Clean Small Appliances Like Toasters and Blenders
Keeping your coffee maker clean sets a great example for maintaining other small kitchen appliances like toasters and blenders. To keep your kitchen efficient and hygienic, focus on toaster maintenance and blender hygiene regularly.
Here are three easy tricks to help you out:
- Empty and shake crumbs: Always unplug your toaster and turn it upside down to shake out crumbs. This prevents buildup and keeps your toaster working smoothly.
- Clean blender parts immediately: After each use, rinse the blender jar and lid with warm soapy water. For a deeper clean, blend warm water with a drop of dish soap, then rinse thoroughly.
- Wipe exterior surfaces: Use a damp cloth to wipe down the outside of both appliances. This removes spills and dust, maintaining their appearance and function.
When and How to Clean Kitchen Appliance Filters and Vents
If you want your kitchen appliances to run efficiently and last longer, you need to clean their filters and vents regularly. Start by checking your appliance’s manual to set a proper vent cleaning schedule. Most recommend monthly or quarterly cleanings depending on usage.
Regularly cleaning your kitchen appliance filters and vents boosts efficiency and extends their lifespan.
For air filter maintenance, remove the filter carefully and rinse it under warm water. If it’s greasy or clogged, soak it in a mild detergent solution before scrubbing gently with a soft brush. Make sure the filter is completely dry before reinstalling it to prevent mold growth.
When cleaning vents, use a vacuum with a brush attachment to remove dust and debris. For stubborn buildup, a damp cloth or a soft brush can help reach tight areas. Keeping up with your air filter maintenance and sticking to a consistent vent cleaning schedule improves airflow, reduces energy consumption, and prevents overheating.
Don’t wait until you notice problems. Regular cleaning keeps your appliances working like new.
Troubleshooting Common Appliance Cleaning Problems Made Easy
Regularly cleaning your appliance filters and vents can prevent many issues, but sometimes problems still arise. When you face an appliance malfunction, don’t panic. Follow these steps to troubleshoot common cleaning problems quickly:
- Check your cleaning schedule: Make sure you’re cleaning filters and vents as recommended. Skipping this can cause buildup that leads to malfunctions.
- Inspect for clogs and blockages: Look inside vents and filters for debris or grease. Remove any obstructions carefully to restore proper airflow.
- Test after cleaning: Once cleaned, run your appliance briefly to see if it operates smoothly. If problems persist, check the user manual or call a professional.
Sticking to a regular cleaning schedule reduces the risk of appliance malfunction, saving you time and money. By troubleshooting effectively, you’ll keep your kitchen appliances running at peak performance with minimal hassle.
Frequently Asked Questions
Can Natural Cleaners Damage Kitchen Appliance Surfaces?
Natural cleaners usually won’t damage your kitchen appliance surfaces if you choose eco-friendly solutions carefully. You need to check the ingredients and test on a small, hidden area first to confirm surface safety.
Some natural acids like vinegar or lemon can harm delicate finishes or seals if used excessively. So, while natural cleaners are gentle overall, you should still use them thoughtfully to protect your appliances from any unintended damage.
How Often Should I Schedule Professional Appliance Maintenance?
You should schedule professional appliance maintenance at least once a year to keep everything running smoothly. Regular maintenance helps catch potential issues early before they become costly repairs.
A professional inspection guarantees your appliances work efficiently and safely. If you use appliances heavily, consider scheduling inspections more frequently, like every six months, to extend their lifespan and avoid unexpected breakdowns.
Don’t wait until something goes wrong. Stay proactive!
What Are the Best Storage Tips to Keep Appliances Dust-Free?
To keep your appliances wrapped in a gentle cloud of cleanliness, use organizational hacks like dedicated shelves and labeled storage containers to create a neat sanctuary. Cover appliances with breathable cloths to prevent dust from settling, and store smaller gadgets inside airtight containers.
Position them away from windows or vents, where dust loves to gather. These simple steps help you maintain a dust-free kitchen environment, saving you time and effort in the long run.
Is It Safe to Use Steam Cleaners on All Kitchen Appliances?
No, steam cleaning isn’t safe for all kitchen appliances. You need to check appliance compatibility first because steam can damage sensitive electronics and finishes.
For example, it’s great for stainless steel surfaces and ovens but risky on microwaves or appliances with electrical controls. Always read your appliance manual to see if steam cleaning is recommended.
Using steam cleaning correctly keeps your appliances spotless without causing harm or voiding warranties.
How Do Appliance Warranties Handle Damage From Improper Cleaning?
About 30% of appliance warranty claims get denied due to cleaning negligence. If you damage your appliance by not following proper cleaning instructions, your warranty coverage likely won’t cover repairs or replacements.
Manufacturers expect you to maintain appliances correctly, so using harsh chemicals or steam cleaners improperly can void your warranty. Always check your appliance’s manual and stick to recommended cleaning methods to keep your warranty valid and avoid unexpected costs.
Conclusion
Remember, “a stitch in time saves nine.” By regularly cleaning your kitchen appliances, you’ll keep them running smoothly and extend their lifespan. Plus, you’ll guarantee your food stays safe.
With the right supplies and simple techniques, maintaining your oven, refrigerator, microwave, and more becomes easy and effective.
So don’t wait, start your cleaning routine today and enjoy a fresher, more efficient kitchen tomorrow. Effective cleaning of kitchen appliances makes all the difference!