10 Simple Steps to Install Hardwood Flooring Like a Pro
If you’ve ever dreamed of installing hardwood flooring but felt overwhelmed by the process, you’re not alone. Many people struggle with where to start or worry about making mistakes that could cost time and money. The good news is, with the right guidance, you can achieve professional-looking results without the stress.
To install hardwood flooring like a pro, start by choosing wood that fits your room’s use and style. Then gather your tools and prep the subfloor by cleaning and leveling it. Acclimate your planks in the room for a few days.
Plan your layout carefully, lay the first rows with consistent spacing, and cut to fit obstacles. Secure boards with nails or adhesive, add matching trim, and finish with a thorough clean-up. Keep going to reveal expert tips for flawless results.
Key Takeaways
- Acclimate hardwood planks in the installation room for 3-7 days to stabilize moisture and prevent warping.
- Measure and plan layout carefully, starting the first row straight along the longest wall. Use spacers for expansion gaps.
- Cut planks precisely around obstacles with a jigsaw, making sure they fit snugly and you avoid waste.
- Secure flooring by nailing at a 45-degree angle or applying adhesive evenly, depending on your subfloor type.
- Finish with matching trim, fill nail holes, seal gaps, and clean thoroughly for a professional look.
How to Choose Hardwood Flooring for Your Room

When choosing hardwood flooring for your room, start by considering the room’s function and traffic levels. If it’s a high-traffic area, you’ll want a durable wood species like oak or maple that can withstand wear and tear. For low-traffic spaces, softer woods like cherry or pine might work well, offering a warm, inviting feel.
Next, examine the color options available within your chosen wood species. Lighter colors can make small rooms feel bigger and brighter, while darker shades add elegance and coziness. Remember, the wood’s natural grain and tone will affect the overall look, so pick something that complements your existing décor.
Don’t forget about finishes; they can improve color and protect the wood. By focusing on function, wood species, and color options, you’ll select flooring that’s both beautiful and practical, setting a solid foundation for your installation project.
Gather Essential Tools and Materials for Hardwood Flooring
Before you begin installing hardwood flooring, you’ll need to gather all the essential tools and materials to guarantee a smooth process. Start by selecting hardwood boards with sustainable sourcing to assure your project is eco-friendly and durable. Pay attention to color selection here, as the wood’s tone sets the room’s entire ambiance.
Next, collect these must-have tools:
- Measuring tape and chalk line for precise cuts and layout.
- Flooring nailer or stapler to fasten the boards securely.
- Miter saw and pry bar to cut and adjust boards as needed.
Additionally, make certain you have underlayment, spacers, and a tapping block on hand. These materials help with soundproofing and proper expansion gaps. Having everything ready beforehand will keep your installation efficient and professional-looking.
Prepare Your Subfloor for a Smooth Installation
Although it might seem like a simple step, preparing your subfloor properly is essential to guarantee your hardwood flooring lays flat and lasts for years. Start by thoroughly cleaning the area. Remove all dust, debris, and old adhesive residues.
Check for any nails or screws sticking out, and hammer or remove them to avoid damaging the flooring. Next, inspect the subfloor for levelness. Uneven spots can cause gaps or squeaks later, so use a leveling compound if necessary.
Don’t forget safety precautions. Wear gloves and a mask while sanding or cleaning, and assure good ventilation. Also, consider environmental factors by disposing of waste materials responsibly and choosing low-VOC cleaning products to minimize harmful emissions.
Finally, confirm the subfloor is dry. Moisture can warp hardwood, so use a moisture meter to check levels. Taking these steps sets a solid foundation for your flooring project, ensuring durability and a professional finish.
Acclimate Hardwood Planks Before Installation
You’ll want to acclimate your hardwood planks before installation to prevent warping or gaps later on. Just keep the wood in the room where it will be installed — ideally for 3 to 7 days — so it can adjust to the temperature and humidity. Taking this step helps make sure your floor stays stable and looks great for years to come.
Importance Of Acclimation
Why does acclimating hardwood planks matter so much? Because it prepares the wood to adjust to your home’s unique environment, preventing issues down the line. When you properly acclimate, you guarantee:
- Moisture control: Wood naturally expands or contracts with humidity changes. Acclimation helps balance this, reducing warping or gaps.
- Temperature regulation: Hardwood reacts to temperature shifts. Letting planks settle avoids buckling or loosening after installation.
- Long-term stability: Acclimated flooring maintains its shape and durability, saving you costly repairs.
Skipping acclimation risks damaged floors and uneven surfaces. By taking time to acclimate, you’re setting your hardwood up for success, ensuring it looks great and performs perfectly for years.
Ideal Acclimation Conditions
Before installing your hardwood flooring, you need to create the right environment for acclimation to guarantee the wood adjusts properly. Start by storing the hardwood planks in the room where they’ll be installed. This allows them to naturally adapt to the space’s moisture levels and temperature control.
Keep the room’s humidity between 30-50% and maintain a consistent temperature of 60-80°F. Avoid placing the wood near direct sunlight or heating vents, as fluctuations can cause uneven expansion or contraction.
Check the moisture content of both the planks and subfloor before installation to prevent future warping. Giving your hardwood at least 3 to 7 days to acclimate ensures the wood stabilizes, providing a durable and beautiful floor that lasts for years.
Plan Hardwood Flooring Layout and Measure Accurately
Although it might seem straightforward, planning your hardwood flooring layout and measuring accurately are essential steps that set the foundation for a flawless installation. Start by considering the type of flooring material you’ll use, as different materials may impact your layout choices.
Next, apply precise measurement techniques to guarantee you cut the boards correctly and avoid costly mistakes.
Follow these three steps:
- Measure the room’s length and width carefully, accounting for irregular shapes or alcoves.
- Calculate the total square footage, adding 5-10% extra for waste and cuts.
- Plan your flooring layout by marking where each board will go, aiming for balanced plank widths along walls to create a polished look.
Install the First Row With Precision and Care
With your layout planned and measurements set, you’re ready to install the first row of hardwood flooring. Start by selecting boards with the best hardwood finishes, as this row sets the tone for the entire floor.
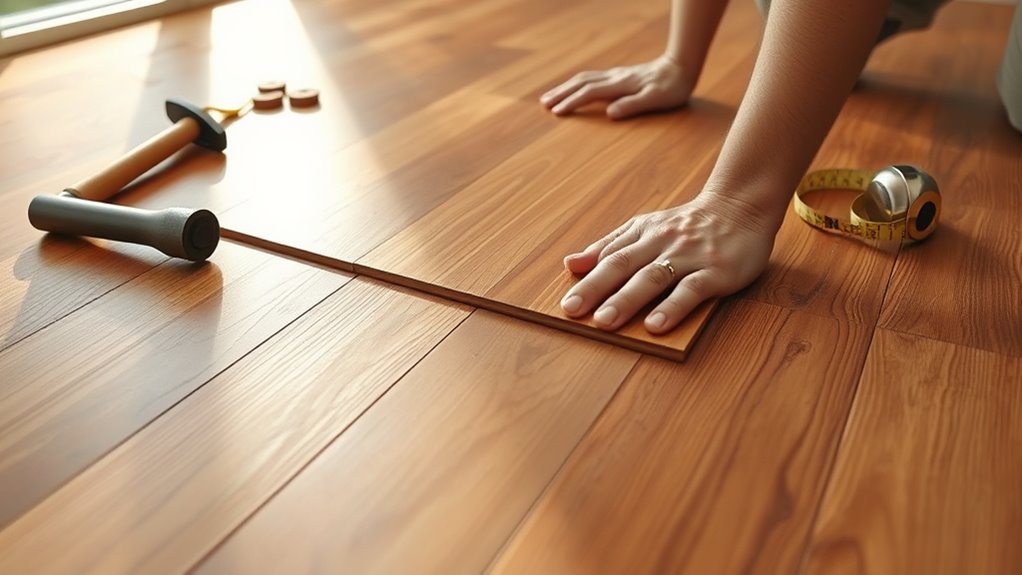
Position the first board carefully along the longest wall, ensuring it’s perfectly straight. This is vital for maintaining accurate flooring patterns throughout the room. Use spacers to keep a consistent expansion gap between the wall and the boards.
Position the first board straight along the longest wall, using spacers to maintain a consistent expansion gap.
Nail or staple the boards securely, but avoid overdriving fasteners to prevent damage. Check alignment frequently to avoid any shifts that could throw off the pattern.
Remember, the first row’s precision directly affects the look and durability of your floor. Take your time to make sure every board fits snugly and stays level.
Once this initial row is flawless, it’ll make installing the rest of the flooring much smoother and professional-looking.
Lay Remaining Boards With Consistent Spacing
As you lay the remaining boards, make sure to keep an even gap between each one. This helps allow for natural expansion. Then, line up each board carefully so the floor looks straight and professional. It’s a good idea to use spacers consistently—that way, the spacing stays uniform across the entire floor.
Maintain Even Gap
When you lay the remaining boards, you’ll want to keep a consistent gap between them to allow for natural expansion and contraction. Maintaining this even space guarantees your hardwood floor stays durable and visually appealing, especially when working with decorative patterns and color matching.
To keep your gaps uniform:
- Use spacers to hold equal distances between boards as you install each row.
- Regularly check the gap width with a measuring tool to avoid irregular spacing.
- Adjust boards slightly before securing them if you notice any variance.
Align Boards Carefully
Maintaining even gaps sets the foundation for aligning your boards accurately. As you lay the remaining boards, focus on consistent spacing to guarantee a smooth, professional look.
Pay close attention to color coordination. Mix boards from different bundles to avoid noticeable patterns or mismatched shades. This approach improves the floor’s natural appeal and helps any minor color variations blend seamlessly.
Keep each board snug but not forced, allowing for natural expansion. Align edges carefully to prevent gaps or uneven surfaces that could cause wear or damage over time.
Following these maintenance tips early on will save you headaches later, keeping your floor durable and visually appealing. Your careful alignment now means less work and better results down the line.
Use Spacers Consistently
Although it might seem minor, using spacers consistently is crucial for achieving even gaps along your walls. Spacer consistency ensures you leave the proper room for flooring expansion, preventing buckling or warping over time.
As you lay the remaining boards, follow these steps:
- Place spacers between the flooring and the wall at regular intervals, typically every 12-16 inches.
- Double-check the gap size frequently to maintain uniform spacing throughout the room.
- Remove spacers only after the flooring is fully installed and secured.
Cut and Fit Flooring Around Obstacles and Edges
Since obstacles and edges often disrupt the flow of your hardwood flooring, you’ll need to carefully measure and cut each piece to fit snugly around them. Start by marking the exact dimensions of the obstacle onto the flooring plank using a pencil, considering your chosen flooring patterns. This guarantees the cuts align perfectly, maintaining a seamless look.
Use a jigsaw or coping saw to make precise cuts, allowing the plank to nestle tightly around corners, pipes, or door frames.
For edges, edge trimming is vital to achieve a clean, professional finish. Trim the planks to fit perfectly along walls or irregular surfaces, ensuring no gaps remain.
Take your time to double-check measurements before cutting, as accurate cuts prevent wasted materials and uneven flooring patterns. By attentively cutting and fitting around obstacles and edges, you’ll boost both the durability and appearance of your hardwood floor installation.
Secure Hardwood Flooring With Nails or Adhesive
Before you secure your hardwood flooring, decide whether nails or adhesive will best suit your project and subfloor type. Nail gun techniques work well on plywood or wooden subfloors, offering a sturdy, traditional fix. Adhesive types, like urethane-based or water-based glues, are ideal for concrete or uneven surfaces, providing strong bonding without penetrating the wood.
Here’s how to proceed:
- For nails, use a flooring nailer or a nail gun to drive nails at a 45-degree angle through the tongue of each board. This ensures a tight fit without damaging the wood.
- When using adhesive, apply it evenly with a trowel according to the manufacturer’s instructions, then press the flooring firmly into place.
- Always stagger your fastening points to prevent loosening and maintain floor stability.
Choosing the right securing method and mastering these steps guarantees your hardwood floor stays solid and beautiful.
Add Trim and Clean Up for a Polished Finish
Now that your hardwood is secure, it’s time to pick the right trim to complement your floor and walls. You’ll want to install the trim neatly—this helps hide any gaps and gives everything a seamless look. Once that’s done, go ahead and give the area a thorough cleaning. This final step really highlights your hard work and gives you that polished finish you’re aiming for.
Choosing The Right Trim
Selecting the right trim can transform your hardwood flooring project from good to exceptional. Decorative trim not only hides expansion gaps but also elevates your room’s style. When choosing trim, consider these key factors:
- Style Compatibility: Match the trim style with your flooring and room décor for a cohesive look. Whether modern or traditional, the right design makes a difference.
- Material Quality: Choose durable, moisture-resistant materials that stand up to wear and tear.
- Height and Thickness: Guarantee the trim size complements your flooring thickness for a seamless transition.
Installing Trim Neatly
Although choosing the right trim sets the stage, installing it neatly guarantees your hardwood flooring looks truly professional. Start by measuring and cutting your trim pieces accurately to fit snugly against walls and corners.
Use a miter saw for precise angles, especially on corners where decorative accents can raise the room’s style. Secure the trim with finishing nails, making sure to countersink them slightly to avoid damage.
Fill nail holes with wood putty matching your trim’s color for a flawless look. Once installed, seal any gaps with a thin bead of paintable caulk to prevent dirt buildup.
Properly installed trim not only improves aesthetics but also supports flooring maintenance by protecting edges from damage and dirt, giving your hardwood a polished, lasting finish.
Final Cleaning Tips
How do you guarantee your hardwood flooring shines as if professionally installed? Start by adding trim to conceal expansion gaps and give your room a finished look.
Next, focus on cleanup using the right tools. Follow these simple maintenance tips and troubleshooting techniques to ensure a polished finish:
- Vacuum or sweep thoroughly to remove dust and debris that can scratch the surface.
- Use a damp mop with a hardwood-safe cleaner. Avoid excess water because it can damage the wood.
- Inspect edges and corners for leftover nails or glue spots and remove them carefully.
Frequently Asked Questions
How Do I Maintain Hardwood Flooring After Installation?
You’ll want to stick to regular cleaning routines, like sweeping or vacuuming with a soft brush to remove dirt and prevent scratches. Mop occasionally with a damp, not wet, cloth using a hardwood floor cleaner.
Don’t forget seasonal adjustments. Humidity changes can cause wood to expand or contract, so use a humidifier in winter and a dehumidifier in summer to keep the environment stable and protect your floors from warping or gaps.
Can Hardwood Flooring Be Installed Over Radiant Heating?
Just like the right foundation supports a castle, radiant heating compatibility is key for hardwood floors. Yes, you can install hardwood over radiant heating, but you need proper subfloor preparation to avoid warping or damage.
Make certain your subfloor is clean, dry, and level, and choose a hardwood species that handles heat well. With careful steps, your floors will stay warm and beautiful, blending comfort with timeless elegance effortlessly.
What Are the Best Finishes for Hardwood Floor Durability?
The best finishes for hardwood floor durability are polyurethane and aluminum oxide. Polyurethane improves wood grain while providing a tough protective layer against scratches and wear. Oil-based versions offer a rich surface sheen, but water-based ones dry faster and yellow less.
Aluminum oxide finishes, often factory-applied, are incredibly hard and long-lasting. Choose a finish that balances the wood grain’s natural beauty with the surface sheen you prefer to keep your floors looking great.
How Do I Repair Scratches or Dents in Hardwood Floors?
To fix scratches, use a scratch repair kit with wood filler or wax sticks that match your floor’s color. For dent concealment, dampen a cloth, place it over the dent, and gently iron it to swell the wood fibers back into place.
You can also lightly sand and refinish the area if needed. These quick fixes help restore your hardwood’s smooth, polished look without replacing boards entirely.
Is It Possible to Refinish Hardwood Flooring Multiple Times?
Yes, you can refinish hardwood flooring multiple times, but how often you do it depends on the thickness of the wood. Studies show most hardwood floors can be sanded and refinished 3 to 5 times before the wear layer gets too thin.
Hardwood sanding removes the old finish and surface imperfections, bringing back the floor’s beauty. Just make sure not to sand too often, or you risk damaging the wood beneath the finish.
Conclusion
Now that you’ve mastered each step, you’re just moments away from stunning hardwood floors that look professionally done. Imagine the warmth and elegance filling your room, a transformation you achieved with your own hands.
But before you step back and admire your work, double-check every board, every nail, every trim detail because the final touch can make all the difference.
Ready to reveal the beautiful space you’ve created? The moment is yours to enjoy your hardwood flooring like a pro.