10 Steps to Easily Repair Drywall Like a Pro
Dealing with damaged drywall can feel overwhelming, and you’re not alone if you find yourself unsure where to start. Many people struggle with getting a smooth, professional-looking finish when repairing holes or cracks.
If you want to fix your walls without the hassle and costly repairs, learning how to repair drywall like a pro is a game-changer.
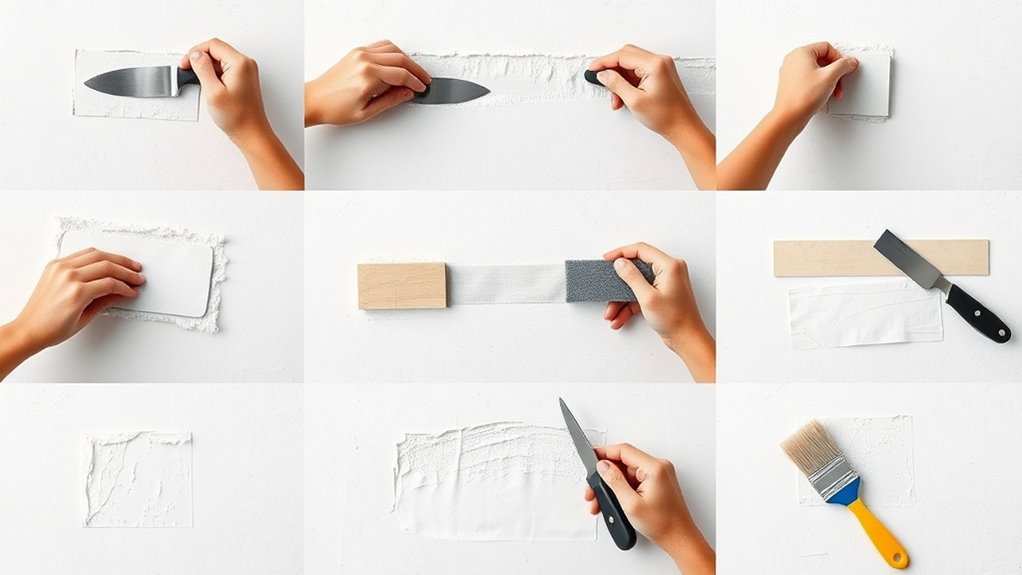
You’ll start by gathering the right tools and cleaning the damaged area thoroughly. Next, cut away loose drywall and apply the proper patch or mesh tape. Mix and spread joint compound smoothly, feathering edges, then sand it until seamless.
Add a second coat for durability, prime the surface evenly, and finish with matching paint. Follow these steps, and you’ll transform your wall like a pro. There’s more to uncover for flawless repairs ahead.
Key Takeaways
- Clean and prepare the damaged drywall area by removing loose debris and sanding edges for a smooth base.
- Cut out damaged drywall precisely and apply mesh tape or patches to reinforce repairs.
- Apply thin, even layers of joint compound, feathering edges for seamless blending with the wall.
- Sand repaired areas using fine-grit sandpaper with gentle motions to achieve a smooth, professional finish.
- Prime the patched surface thoroughly and paint with matched color and sheen for a flawless look.
Get the Tools You Need for Drywall Repair
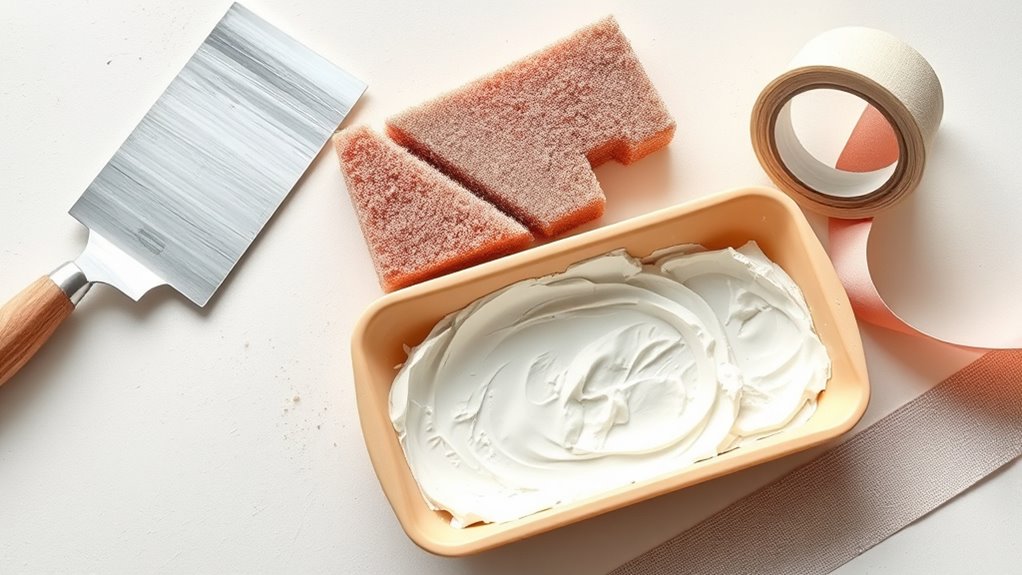
Before you start fixing your drywall, gather the essential tools to make the job easier and more efficient. You’ll need a putty knife, a sanding block, drywall compound, and a utility knife as your basics.
If you’re dealing with more intricate drywall textures, consider a texture spray or a sponge to match the existing finish seamlessly. Having drywall tape on hand also helps reinforce repairs and prevent future cracks.
Investing in the right tools upfront can significantly reduce your repair costs by minimizing mistakes and the need for repeated fixes. Don’t forget a dust mask to protect yourself during sanding.
Clean and Remove Loose Drywall Around Damage
First, clear away any loose debris around the damaged area to create a clean surface. Then, carefully trim and smooth the edges of the damaged drywall. This will help ensure proper adhesion. Doing these steps will help your repair materials stick better and give you a cleaner finish.
Clearing Loose Debris
How do you guarantee a smooth repair when dealing with damaged drywall? Start by focusing on drywall cleaning and debris removal. You need to clear away any loose debris around the damaged area to create a solid base for your patch.
Use a putty knife or utility knife to gently scrape off crumbling drywall bits and dust. Be thorough. Any leftover debris can prevent the repair materials from adhering properly, leading to uneven surfaces or future cracks.
After scraping, vacuum or wipe the area to remove fine dust. This step is vital because it ensures your repair will last longer and look professional. Taking time to clear loose debris now saves you from dealing with repair issues later.
Preparing Damaged Edges
Three key actions will guarantee your damaged drywall edges are properly prepared for repair: cleaning, trimming, and smoothing. First, clean the area by removing all dust and loose drywall around the damage to ensure proper adhesion.
Next, trim ragged or jagged edges with a utility knife, creating a neat, defined opening that makes texture matching easier later on. Finally, focus on edge smoothing. Gently sand the edges to blend them seamlessly with the surrounding wall surface.
This step is vital for achieving a professional finish and helps the new compound adhere evenly. By carefully preparing the damaged edges, you set the foundation for a flawless repair that blends perfectly, making your drywall look brand new again.
Cut Away Loose or Damaged Drywall Cleanly
You’ll want to use a sharp utility knife or drywall saw to make clean, precise cuts around the damaged area. Take a close look and identify any loose or crumbling drywall that needs removing. By cutting away only the damaged sections, you ensure a solid surface for your patch.
Tools For Clean Cuts
Clean, precise cuts make all the difference when removing loose or damaged drywall. To achieve this, you’ll want a sharp utility knife. Its replaceable blades guarantee clean edges, which is vital for seamless texture matching later.
A drywall saw or jab saw helps cut through thicker sections with ease, but always maintain your tools to avoid ragged cuts. Keep blades sharp and handles secure for better control.
A sanding block or sponge is essential for smoothing edges after cutting, preparing the surface for patching. Proper tool maintenance not only prolongs their life but also guarantees accuracy.
With these tools in hand and well cared for, you’ll cut away damaged drywall cleanly, setting a solid foundation for a professional-looking repair.
Identifying Damaged Areas
After preparing your tools for precise cuts, the next step is to carefully examine the drywall for any loose or damaged areas. Look closely for signs of drywall damage like cracks, holes, or crumbling edges. Common causes include water leaks, impact from furniture, or settling of the house.
Once you spot the damaged sections, mark them for removal. Use a utility knife or drywall saw to cut away loose or weakened drywall cleanly, creating smooth edges. This prevents further damage and guarantees your patch will adhere properly.
Removing all compromised material is essential because any leftover loose drywall can cause your repair to fail. By identifying and cutting out only the damaged areas, you set yourself up for a strong, professional-looking drywall repair.
Choose and Apply the Right Patch or Mesh Tape
Selecting the right patch or mesh tape is essential for a smooth drywall repair that lasts. For small holes, choose a self-adhesive patch that fits snugly over the damage. Larger holes often require mesh tape to reinforce the repair area.
When applying mesh tape, press it firmly over the crack or hole, ensuring it lies flat without wrinkles. This helps prevent bubbles under the joint compound.
Here’s a quick guide to patch selection and mesh tape application:
| Damage Size | Recommended Patch Type | Application Tip |
|---|---|---|
| Small holes (<2") | Self-adhesive patch | Center patch over hole |
| Medium holes (2-6″) | Mesh tape + patch | Apply mesh tape first |
| Large holes (>6″) | Drywall patch + mesh | Secure patch before taping |
| Cracks | Mesh tape | Lay tape along the crack |
| Uneven surfaces | Fiberglass mesh tape | Smooth tape for better grip |
Follow these steps carefully to ensure your drywall patch holds strong.
Mix and Spread Joint Compound Evenly on Drywall
One key step to a flawless drywall repair is mixing and spreading the joint compound evenly. Start by preparing the compound to a smooth, creamy consistency. Too thick, and it’ll be tough to spread. Too thin, and it won’t hold properly.
Achieve flawless drywall repair by mixing joint compound to a smooth, creamy consistency for easy spreading and strong hold.
Use a clean drywall knife to scoop and apply the compound, pressing it firmly into the patch or tape. Spread it in thin, even layers to avoid lumps and ensure proper adhesion.
Pay close attention to texture matching. The surface should blend seamlessly with the surrounding drywall. This means replicating the wall’s finish, whether smooth or textured, before the compound dries.
Also, avoid applying overly thick layers, as trapped moisture can lead to bubbling or mold. Proper moisture prevention begins here, since joint compound is porous and can absorb water if not applied correctly.
Feather Drywall Edges to Blend Seamlessly
When you feather drywall edges, you create a smooth shift that hides seams and imperfections. This step is vital for professional-looking repairs. Start by applying a thin layer of joint compound beyond the seam, extending it several inches onto the surrounding drywall.
Use a wide drywall knife to spread the compound evenly, gradually tapering the thickness to create a gentle slope. This gradual thinning is the essence of feathering techniques and guarantees seamless edge blending.
Focus on maintaining consistent pressure on your knife to avoid ridges or uneven spots. Feathering helps the repaired area blend into the wall, making it less visible once painted. Don’t rush this step. Take your time to smooth out edges carefully.
Proper edge blending sets the foundation for a flawless finish and makes the next steps, like sanding, much easier. Mastering feathering techniques will boost your drywall repair from amateur to pro quality.
Sand the Drywall Smooth After It Dries
Once your drywall compound is completely dry, it’s time to sand it smooth for a flawless finish. You’ll want to choose fine-grit sandpaper so you don’t accidentally damage the surface.
Use gentle, even strokes to blend the edges seamlessly. Just remember to sand lightly and check your work often—this way, you’ll get that perfect smoothness you’re aiming for.
Choosing The Right Sandpaper
Selecting the right sandpaper is essential for achieving a smooth, professional finish on your drywall. You want to choose sandpaper with a grit that matches your project’s needs. Usually, between 120 and 220 grit works best.
Coarser grits remove material quickly but can leave scratches, impacting the surface texture. Finer grits smooth out imperfections, preparing the wall for a flawless paint finish.
Avoid overly coarse sandpaper, which can damage the drywall surface and create uneven textures. On the other hand, too fine a grit won’t effectively smooth rough patches.
Sanding Techniques For Smoothness
After your drywall compound dries completely, you’ll want to sand it carefully to achieve a smooth, even surface. Use a sanding block or pole sander with fine-grit sandpaper, moving in gentle, circular motions to avoid gouges.
Focus on blending the repaired area with the surrounding wall for perfect texture matching. Take your time, checking frequently under good lighting to catch any uneven spots. Once smooth, wipe away dust with a damp cloth before moving on.
Proper sanding sets the stage for primer selection, ensuring the primer adheres well and creates a uniform finish. Remember, a well-sanded surface makes paint application easier and hides repairs seamlessly, giving your drywall that professional, flawless look.
Put on a Second Coat for Better Coverage
Although the first coat helps fill in most gaps, applying a second coat guarantees a smoother, more even surface. This second coat provides better coverage, hiding any imperfections left behind.
When you apply it, make sure the first coat is completely dry and sanded lightly. Use a wider trowel or knife to feather out the edges, blending the repair seamlessly with the surrounding wall.
Don’t rush. Take your time to get an even layer that will make your repair look professional.
Here’s a quick guide to help you apply the second coat effectively:
| Step | Tip |
|---|---|
| Drying Time | Wait 24 hours before next coat |
| Sanding | Lightly sand first coat |
| Application Tool | Use a wider putty knife |
| Thickness | Apply thin, even layers |
| Edging | Feather edges for smooth blend |
Following these tips ensures your drywall repair gets better coverage and a flawless finish.
Prime the Repaired Drywall Properly
Once your second coat is dry and sanded smooth, you’ll want to prime the repaired area to prepare it for painting. Primer application is essential because it seals the joint compound, guaranteeing even paint absorption and preventing blotchy spots.
Use a high-quality primer designed for drywall repairs to get the best results. Apply the primer evenly with a roller or brush, focusing on covering the entire patched surface.
Choose a quality drywall primer and apply evenly with a roller or brush for complete coverage.
Pay attention to the drywall texture when priming. If your repair area has a different texture than the rest of the wall, the primer helps create a uniform base. This step ensures your paint adheres properly and looks consistent.
Allow the primer to dry completely before moving on. Skipping or rushing primer application can cause paint to peel or show uneven color. Taking your time here means your drywall repair will blend seamlessly with the surrounding wall, giving your space a professional finish.
Paint to Match Your Wall
To achieve a seamless look, you’ll want to carefully select paint that matches your wall’s color and finish. Start by taking a small chip of your wall paint to the store for accurate color matching. Many stores offer tools that scan the sample and mix paint to match perfectly. If you can’t get a sample, try to note the exact color name or code from your original paint.
Next, consider the paint finishing. Your repaired drywall will blend best if the paint’s sheen matches your existing wall, whether it’s matte, eggshell, satin, or semi-gloss. Using a different finish can make the patch stand out, even if the color matches.
Before painting the entire patch, test the paint in a small, inconspicuous area. This helps you confirm both color matching and paint finishing. Once you’re satisfied, apply the paint evenly to complete your drywall repair like a pro.
Frequently Asked Questions
How Long Does Drywall Repair Typically Take to Dry Between Coats?
You’ll usually need to wait about 24 hours for drywall compound to dry between coats, depending on humidity and temperature. Using the right repair tools helps you apply smooth drywall texture, guaranteeing it dries evenly.
If you’re in a hurry, a thinner coat or a quick-setting compound can speed things up, but don’t rush the drying process. Proper drying prevents cracks and ensures your repair looks professional.
Can I Repair Drywall Without Removing the Damaged Area Completely?
You don’t always have to tear out the whole damaged area; sometimes, alternative repair methods can patch things up neatly. For small dents or holes, DIY drywall fixes like using spackle or patch kits work wonders without full removal. It’s like giving your wall a quick bandage instead of surgery.
Just clean the spot, apply the filler, sand, and paint. This saves time and keeps the job simple for you.
What Safety Precautions Should I Take When Sanding Drywall?
You should always wear protective gear like a dust mask or respirator, safety goggles, and gloves when sanding drywall to avoid inhaling dust and irritating your eyes or skin.
Make sure you work in a well-ventilated area by opening windows or using fans to keep the air flowing. These ventilation precautions help reduce dust buildup and keep your workspace safer and more comfortable while you sand.
How Do I Prevent Cracks From Reappearing After Repair?
Think of cracks like tiny rivers carving through your wall’s landscape. To prevent them from reappearing, you need to address the root crack causes, like moisture, settling, or poor joint taping.
Use a high-quality joint compound and mesh tape for long-term solutions. Also, control humidity and guarantee proper framing.
Is It Necessary to Use Primer Before Painting Repaired Drywall?
Yes, you should always use primer before painting repaired drywall. Primer application guarantees proper surface preparation by sealing the patched area and providing a uniform base for the paint.
Without primer, paint can soak unevenly into the drywall, causing blotches or peeling. So, by applying primer, you help your paint adhere better and achieve a smooth, professional finish that lasts longer.
Don’t skip this essential step!
Conclusion
Now that you’ve mastered these 10 steps, repairing drywall will feel like a breeze, even easier than snapping your fingers! With the right tools, careful prep, and a bit of patience, you’ll transform any wall damage into a flawless finish.
Keep practicing these techniques, and soon you’ll tackle drywall repairs like a seasoned pro. You’ll save time and money while making your walls look brand new. You’ve got this when it comes to drywall repair!