How to Fix a Dripping Kitchen Faucet: A Complete Guide to Repairing a Leaky Faucet Single Handle
Introduction
How to Fix a Dripping Kitchen Faucet? That steady drip-drip-drip coming from your kitchen faucet isn’t just annoying — it’s wasting water, driving up your utility bill, and often signals a simple mechanical issue that’s easy to fix once you understand what’s causing it. Learning how to fix a dripping kitchen faucet is one of the most practical skills a homeowner can pick up, and in most cases, it doesn’t require calling a plumber or spending a fortune on replacement parts.
This guide walks through everything you need to know, with a particular focus on how to repair a leaky faucet single handle, since single-handle faucets make up the majority of modern kitchen installations and have their own specific repair process. Whether your faucet drips constantly or only occasionally, this guide will help you diagnose the cause, choose the right fix, and get your kitchen sink back to working order.
Why Your Kitchen Sink Matters
The kitchen sink and faucet see more daily use than almost any other fixture in your home. Between washing dishes, filling pots, rinsing produce, and countless smaller tasks throughout the day, your faucet is under near-constant mechanical stress. This heavy use is exactly why faucets eventually develop leaks — internal components like washers, O-rings, and cartridges wear down over time from repeated use.
A dripping faucet isn’t just a minor inconvenience. A faucet that drips even once per second can waste several gallons of water per day, adding up to thousands of gallons — and a noticeably higher water bill — over the course of a year. Beyond the financial cost, constant dripping can contribute to mineral buildup and staining in your sink basin, and in some cases, trapped moisture around the faucet base can even contribute to mold growth under the sink. Addressing a leak promptly, once you know how to fix a dripping kitchen faucet, protects both your wallet and your home.
Different Types of Leaky Faucet Issues
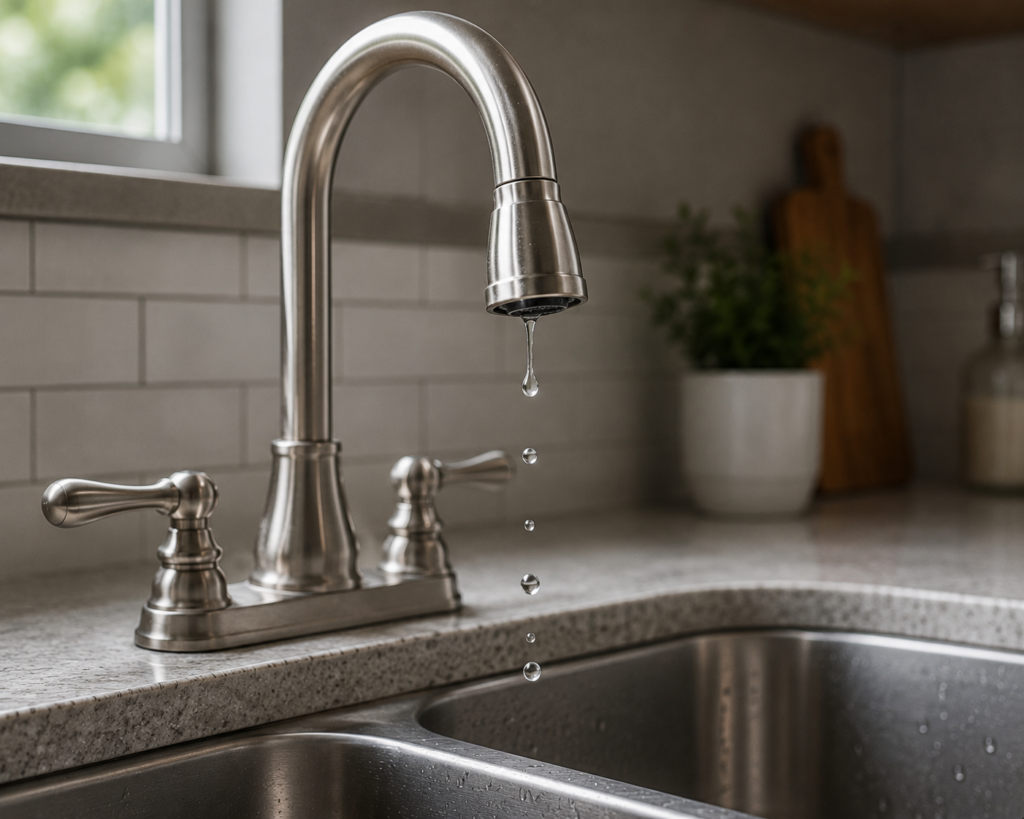
Not all faucet leaks are the same, and understanding the specific type of leak you’re dealing with is the first step toward an effective repair. Here are the most common causes behind a leaky faucet single handle or dual-handle design.
- Worn Cartridge: In single-handle faucets, the cartridge controls both water flow and temperature. Over time, the cartridge’s internal seals degrade, leading to a persistent drip.
- Worn O-Rings: Small rubber rings that seal connections within the faucet body. When they dry out, crack, or wear down, water can seep out around the base or handle.
- Damaged Washers: Common in compression-style faucets, washers press against the valve seat to stop water flow. A worn or torn washer is one of the most frequent causes of dripping.
- Corroded Valve Seat: The valve seat connects the faucet to the spout, and mineral deposits or corrosion here can cause leaking around the spout area.
- Loose or Worn Adjusting Ring: In ball-type faucets, the adjusting ring beneath the handle controls tension. If it loosens over time, leaking can occur.
- Faulty Ball Assembly: Ball-type single-handle faucets use a rotating ball to control flow and temperature; wear on this component can cause leaking around the handle.
- Damaged Diverter: In faucets with a pull-out or pull-down sprayer, a worn diverter valve can cause leaking or reduced flow at the spray head.
- Cracked Faucet Body: Less common, but age or manufacturing defects can lead to hairline cracks that leak, often requiring full faucet replacement.
- Deteriorated Supply Line Connections: Leaks aren’t always from the faucet itself — worn washers or loose fittings at the supply line connections beneath the sink can mimic a faucet leak.
- Water Pressure Issues: Excessively high water pressure can strain internal seals and components, accelerating wear and leading to more frequent leaks than normal.
- Mineral and Sediment Buildup: Hard water deposits inside the faucet’s internal components can prevent proper sealing, causing intermittent or steady dripping even when other components are otherwise in good condition.
Faucet Fix Materials Comparison
When repairing a leaky faucet, the materials used in replacement parts matter for long-term durability. Here’s how common options compare.
Rubber Washers and O-Rings: Affordable and widely available, rubber components are the standard choice for most repairs. They offer solid performance but typically need replacing every few years as they dry out and wear down.
Silicone O-Rings: A step up from standard rubber, silicone resists heat and degradation better over time, making it a good choice for a longer-lasting repair, often at a slightly higher cost.
Ceramic Disc Cartridges: Increasingly common in modern faucets, ceramic cartridges are highly durable and resistant to mineral buildup, generally outlasting rubber-based washer systems significantly, though replacement cartridges cost more upfront.
Brass Valve Components: Known for corrosion resistance and durability, brass internal components tend to outperform cheaper plastic alternatives, particularly in areas with hard water.
Plastic Cartridges and Components: Budget-friendly but generally less durable, plastic components are more prone to cracking or wearing out faster than metal or ceramic alternatives, making them a less ideal long-term choice.
Mounting Styles Explained
Kitchen faucets are installed using a few different mounting configurations, which can affect how you approach a repair.
Deck-Mounted Faucets: The most common style, mounted directly through the sink deck or countertop, typically secured with a mounting nut accessible from beneath the sink.
Wall-Mounted Faucets: Installed directly into the wall above the sink rather than through the countertop, requiring access to plumbing within the wall for certain repairs.
Single-Hole Mount: Common with single-handle faucets, this configuration uses one hole in the sink or counter for the entire faucet assembly, often including a pull-down or pull-out sprayer built into the spout.
Widespread Mount: Typically used with two-handle faucet designs, where the handles and spout are installed as separate pieces across multiple holes in the countertop.
Single vs. Double Kitchen Faucet
Choosing (or repairing) between a single-handle and double-handle kitchen faucet affects both daily usability and the repair process itself.
Single-Handle Faucets
Single-handle faucets control both water flow and temperature through one lever, typically relying on an internal cartridge or ball assembly. Learning how to repair a leaky faucet single handle typically involves accessing and replacing this single internal cartridge, making the repair process relatively straightforward once you know which type of cartridge your faucet uses.
Double-Handle Faucets
Double-handle faucets use separate hot and cold handles, often relying on compression valves with washers, or in some newer models, individual cartridges for each handle. Repairs typically involve addressing each handle’s internal components independently.
Pros & Cons of Each Type
Single-Handle Faucets
Pros: Convenient one-handed operation, simpler temperature and flow adjustment, and typically fewer individual components to maintain over time.
Cons: When the single cartridge fails, it affects both hot and cold water control simultaneously, and replacement cartridges must be matched precisely to your specific faucet model.
Double-Handle Faucets
Pros: Precise, independent control over hot and cold water, and often simpler, more universally available replacement parts like standard washers.
Cons: Requires two hands to adjust temperature and flow, and has more individual components that can wear out over time, potentially leading to more frequent repairs across the faucet’s lifespan.
How to Fix a Dripping Kitchen Faucet: Step-by-Step Tips
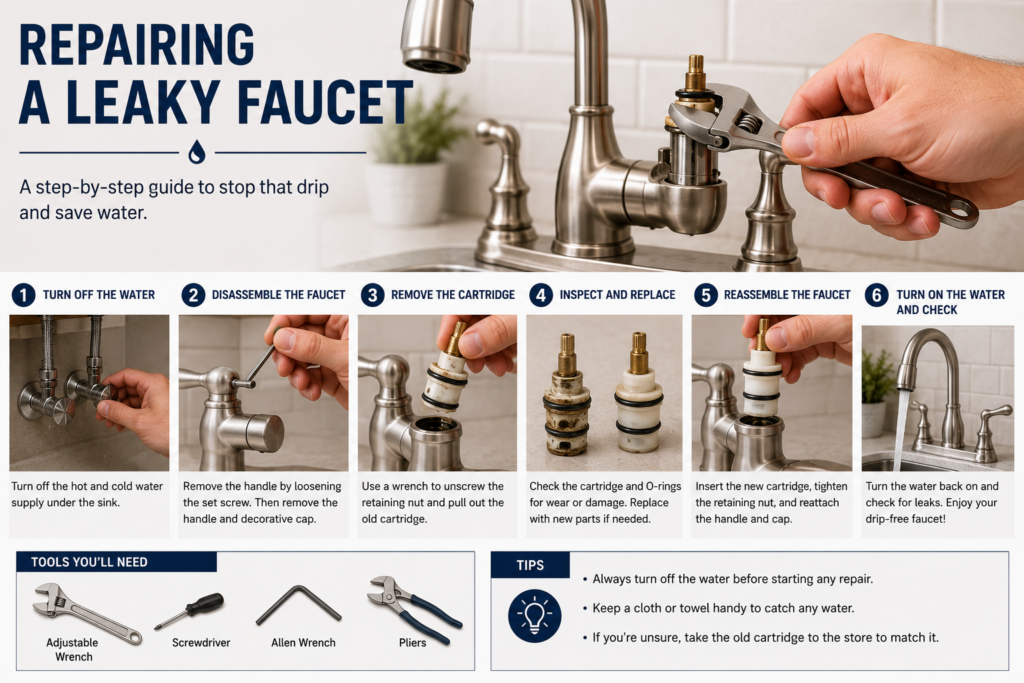
Here’s a general walkthrough for how to fix a dripping kitchen faucet, with a focus on how to repair a leaky faucet single handle specifically.
Step 1: Turn Off the Water Supply Locate the shutoff valves beneath the sink and turn them clockwise to stop water flow before beginning any repair.
Step 2: Plug the Drain Place a rag or stopper in the drain to prevent small parts from falling in during disassembly.
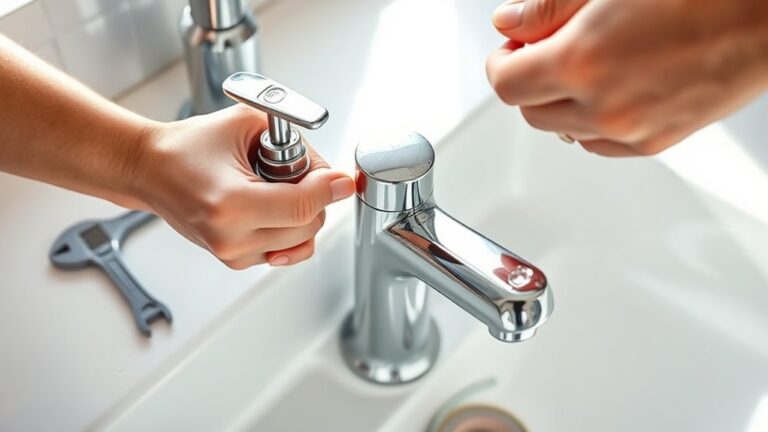
Step 3: Remove the Handle Most single-handle faucets have a small screw hidden beneath a decorative cap on top of the handle. Remove the cap, unscrew the screw, and lift the handle off.
Step 4: Access and Remove the Cartridge Depending on your faucet brand, you may need to remove a retaining clip or nut to access the cartridge. Carefully pull the old cartridge straight out.
Step 5: Inspect O-Rings and Seals While the cartridge is out, check the surrounding O-rings for cracking or wear, and replace them if needed.
Step 6: Install the New Cartridge Insert the replacement cartridge (matched to your exact faucet model) in the same orientation as the original, then reattach any retaining clips or nuts.
Step 7: Reassemble the Handle Reattach the handle, screw, and decorative cap.
Step 8: Turn the Water Supply Back On Slowly turn the shutoff valves counterclockwise and check for leaks around the base and handle.
Step 9: Test the Faucet Run the water through a full range of motion, checking for smooth operation and confirming the drip has stopped.
Cleaning & Maintenance
Regular maintenance helps prevent future leaks and extends the life of your faucet. Periodically remove and clean the aerator at the tip of the spout to prevent mineral buildup from restricting flow. Wipe down the faucet body regularly with a mild soap and soft cloth to prevent hard water spots and buildup around the base. In areas with hard water, consider a monthly vinegar soak for the aerator to dissolve mineral deposits before they cause bigger problems. Avoid using excessive force when operating the handle, since aggressive use accelerates wear on internal components.
Common Mistakes to Avoid
Avoid forgetting to turn off the water supply before starting, which can lead to unexpected spraying and water damage. Don’t use generic replacement parts without confirming compatibility with your specific faucet brand and model, since cartridges and washers vary significantly between manufacturers. Avoid overtightening components during reassembly, as this can crack plastic parts or damage seals. Don’t skip inspecting O-rings while you have the faucet disassembled, since replacing them now is far easier than reopening the faucet again shortly after. Finally, don’t ignore a minor drip, since delaying repair typically leads to worse leaks and higher water waste over time.
FAQs
1. Why does my kitchen faucet keep dripping after I already replaced the washer? This often indicates a worn valve seat or O-ring that also needs replacement, not just the washer.
2. How do I know if my faucet is a cartridge, ball, or compression type? Check the handle configuration — single handles are usually cartridge or ball type, while separate hot/cold handles are typically compression valves.
3. Can I fix a dripping faucet without turning off the water? No, you should always shut off the water supply first to avoid flooding and to safely disassemble the faucet.
4. How often should I replace faucet cartridges? Most cartridges last several years, but replacement timing depends on water quality and usage frequency.
5. What tools do I need to fix a dripping kitchen faucet? Typically an adjustable wrench, screwdriver, and possibly an Allen key, along with the correct replacement cartridge or washer.
6. Is it cheaper to repair or replace my kitchen faucet? Repair is almost always cheaper, provided replacement parts are readily available for your faucet’s brand and model.
7. Why is my single-handle faucet leaking from the base? This usually points to worn O-rings around the cartridge housing rather than the cartridge itself.
8. Can hard water cause faucet leaks? Yes, mineral buildup can prevent internal components from sealing properly, leading to leaks over time.
9. How do I find the right replacement cartridge for my faucet? Check the brand and model printed on the faucet or in your original installation manual, or bring the old cartridge to a hardware store for matching.
10. Why does my faucet drip only when the water heater is running? This can indicate thermal expansion issues affecting internal seals, particularly in older faucets.
11. Is a dripping faucet actually costing me much money? Yes — even a slow drip can waste several gallons per day, adding up significantly over a year.
12. Can I use plumber’s tape to fix a leaky faucet? Plumber’s tape helps with threaded connection leaks but won’t fix internal cartridge or washer issues.
13. Should I call a plumber instead of fixing it myself? If the faucet body itself is cracked, or if leaks persist after replacing internal components, professional help may be needed.
14. How long does a typical faucet repair take? Most single-handle cartridge replacements take 30 minutes to an hour for a first-time DIYer.
15. Do all single-handle faucets use the same type of cartridge? No, cartridges vary significantly by brand and model, so always confirm compatibility before purchasing a replacement.
Conclusion
Learning how to fix a dripping kitchen faucet is a manageable, rewarding DIY task that saves money and prevents water waste. Whether you’re dealing with a worn cartridge, degraded O-rings, or mineral buildup, understanding how to repair a leaky faucet single handle empowers you to resolve the issue confidently rather than living with an annoying, wasteful drip. With the right tools, a little patience, and the steps outlined in this guide, most kitchen faucet leaks can be fixed in under an hour, restoring your sink to full working order.