7 Simple Steps to Clean Mold Off Your Bathroom Ceiling
Dealing with mold on your bathroom ceiling can be really frustrating. You’re not alone—many people struggle with pesky mold that keeps coming back despite their best efforts. Finding an effective way to clean it off and prevent it from returning is a common challenge, but it’s totally manageable once you know the right steps.
To clean mold off your bathroom ceiling, first spot mold by checking for discoloration or musty smells. Gather your cleaning supplies and wear gloves and a mask for safety. Improve ventilation by opening windows or turning on fans.
Mix a natural solution like vinegar, baking soda, and tea tree oil, then scrub the mold gently. Rinse and dry the area thoroughly to prevent regrowth. Keep moisture low with good airflow to stop mold from returning.
You’ll find more helpful tips to keep your ceiling mold-free.
Key Takeaways
- Identify mold by spotting discoloration, musty odors, and clustered patches on the bathroom ceiling before starting cleaning.
- Improve bathroom ventilation by opening windows, using exhaust fans, and reducing moisture to prevent mold growth.
- Apply a natural cleaning solution of vinegar, baking soda, and tea tree oil using gloves and a soft brush to scrub mold spots.
- Rinse the ceiling thoroughly and dry completely with fans or open windows to avoid moisture retention.
- Maintain mold-free ceilings by regularly inspecting for leaks, controlling humidity, and ensuring proper ventilation.
Identify Mold on Your Bathroom Ceiling
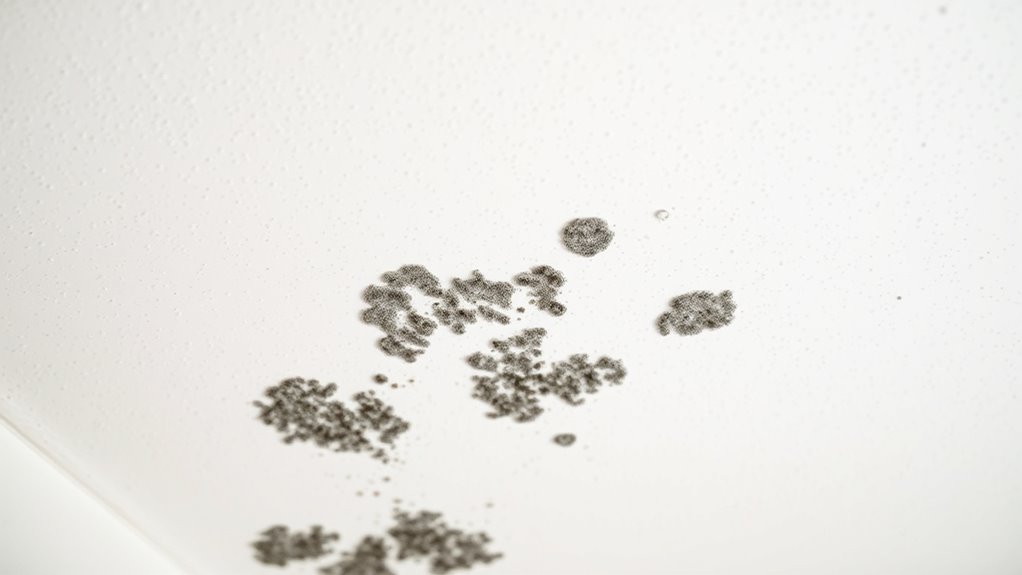
How can you tell if the spots on your bathroom ceiling are mold? First, look closely for signs of mold growth, which often appears as black, green, or brown patches. These spots usually cluster in damp areas where moisture lingers, like near the shower or bathtub.
Check for black, green, or brown patches clustered in damp bathroom areas like near the shower or bathtub.
Ceiling discoloration is another key indicator. If your bathroom ceiling shows yellowish, brown, or darkened areas, it might signal mold beneath the paint or surface. You might also notice a musty odor, which often accompanies mold growth.
Since mold thrives in humid environments, any persistent condensation on your ceiling increases the risk. If the spots spread or feel slimy, it’s a clear sign you’re dealing with mold.
Catching mold early helps prevent damage and health issues, so don’t ignore these warning signs. Identifying mold on your bathroom ceiling accurately lets you take the right steps to clean it safely and effectively.
Get Your Cleaning Supplies and Safety Gear Ready
Before you start cleaning, make sure to gather all the essential supplies. You’ll need things like a mold cleaner, a scrub brush, and a spray bottle.
And don’t forget to put on protective gear—gloves, goggles, and a mask are key to keeping yourself safe.
Also, it’s a good idea to prepare your workspace by covering nearby surfaces. This way, you can prevent any damage or mess while you work.
Essential Cleaning Supplies
What tools will you need to tackle mold on your bathroom ceiling effectively? Start with basic cleaning tools like a spray bottle, a soft-bristle brush, and microfiber cloths. These help you apply cleaning solutions and scrub the surface gently without damaging the paint or ceiling material.
You’ll also want a bucket for mixing your cleaning solution, typically a mix of water and vinegar or bleach, to kill mold spores thoroughly. Don’t forget to have paper towels handy for wiping away residue.
Using the right cleaning tools ensures you remove mold spores efficiently, preventing them from spreading further. Preparing these supplies before you start will make the cleaning process smoother and safer, helping you restore your bathroom ceiling to a clean, mold-free state.
Protective Safety Gear
Why should you never skip protective safety gear when cleaning mold off your bathroom ceiling? Mold releases spores that can irritate your respiratory system and skin. Wearing the right safety equipment protects you from harmful exposure and keeps the cleanup safe.
Before you start, gather essential protective gear like gloves, goggles, and a mask rated for mold spores. Gloves shield your hands from mold and cleaning chemicals, while goggles prevent spores and splashes from reaching your eyes. A respirator mask ensures you don’t inhale dangerous spores or fumes.
Preparing Your Workspace
Since mold removal involves both safety and effectiveness, you’ll want to gather all your cleaning supplies and make sure your protective gear is within reach before you start. Begin with a tools overview: grab a spray bottle filled with mold cleaner, a scrub brush, microfiber cloths, gloves, goggles, and a mask.
Organize your workspace by clearing the bathroom ceiling area so you can move freely without knocking anything over. Lay down a drop cloth or old towels to catch any drips. Keep your supplies close but out of your way to avoid accidents.
This thoughtful workspace organization will help you work efficiently and stay safe while tackling the mold. Having everything prepared means you can focus fully on cleaning without interruptions.
Set up Your Bathroom to Keep Mold From Spreading
Before you start cleaning, you’ll want to prepare your bathroom to prevent mold spores from spreading to other areas. Begin by improving ventilation. Open windows and turn on the exhaust fan to increase airflow.
If your bathroom lacks proper ventilation, consider adding a vent or using a portable fan to help circulate air. This reduces humidity, which mold thrives on.
Next, focus on moisture control. Wipe down wet surfaces and fix any leaks in pipes or fixtures to eliminate excess water that encourages mold growth.
Remove towels and rugs that can trap moisture. You might also use a dehumidifier if your bathroom tends to stay damp.
Mix a Homemade Mold-Cleaning Solution
You can tackle mold effectively by mixing natural ingredients like vinegar and baking soda. Just be careful when combining them, because if you’re not, you might end up with reactions that actually reduce their cleaning power. So, it’s all about getting the right mix.
With the right combination, you’ll create a solution that’s both strong and safe for your bathroom ceiling. It’s a simple way to keep things mold-free without using harsh chemicals.
Effective Natural Ingredients
Although commercial cleaners can be effective, mixing a homemade mold-cleaning solution with natural ingredients offers a safer and eco-friendly alternative. You can rely on natural remedies like white vinegar, baking soda, and tea tree oil, all known for their mold-fighting properties.
White vinegar’s acidity breaks down mold, while baking soda acts as a gentle abrasive and deodorizer. Tea tree oil, with its antifungal benefits, helps prevent mold from returning. These ingredient benefits make your cleaning solution both powerful and non-toxic, ideal for bathroom ceilings.
Using natural remedies not only protects your health but also reduces environmental impact. By combining these ingredients thoughtfully, you’ll create an effective mold cleaner without harsh chemicals, keeping your bathroom fresh and safe.
Safe Mixing Techniques
Combining natural ingredients like white vinegar, baking soda, and tea tree oil can create a powerful mold-cleaning solution, but mixing them safely is key to preserving their effectiveness and your health. Understanding chemical reactions and proper ingredient ratios helps you avoid harmful fumes or weakened mixtures.
Follow these tips when mixing your solution:
- Always add baking soda to vinegar slowly to prevent excessive fizzing from chemical reactions.
- Use recommended ingredient ratios; for example, one cup vinegar, one teaspoon baking soda, and 10 drops tea tree oil.
- Mix in a well-ventilated area to avoid inhaling any fumes.
- Store the solution in a labeled spray bottle and shake gently before each use.
Scrub and Remove Mold From the Ceiling
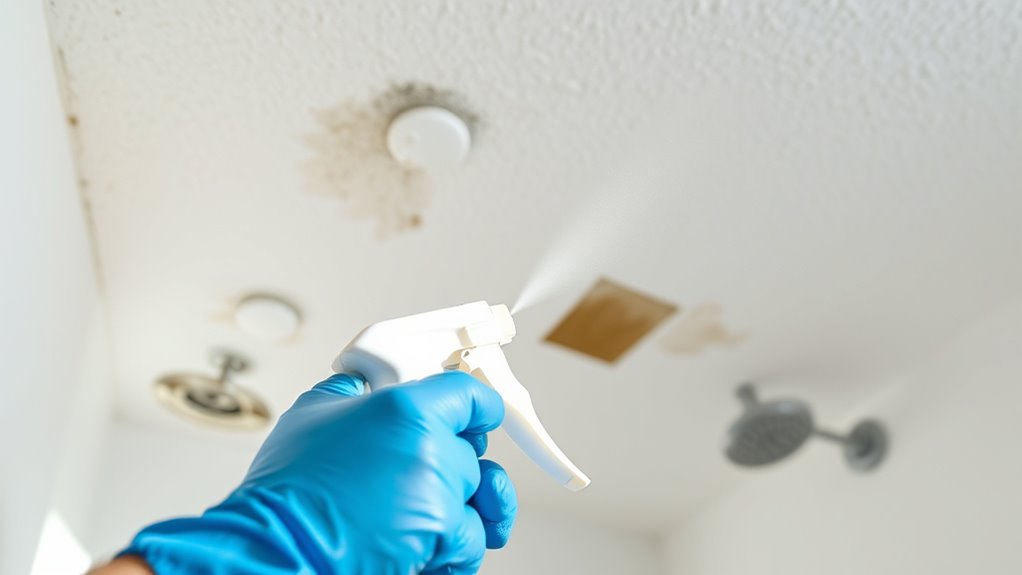
Before scrubbing, make sure you’ve put on gloves and a mask to protect yourself from mold spores. Grab a soft-bristle brush or sponge and dip it into your cleaning solution. Gently scrub the areas with visible mold growth and ceiling discoloration, focusing on spots where the mold looks most stubborn.
Avoid using too much pressure, as it might damage the ceiling’s surface. Work in small sections, ensuring you cover all affected areas thoroughly.
If you notice the mold isn’t coming off easily, apply a bit more cleaning solution and let it sit for a few minutes before scrubbing again. Keep an eye out for any hidden mold behind discoloration since it can spread if left untreated.
Rinse and Dry the Ceiling Thoroughly
Once you’ve finished scrubbing, rinse the ceiling thoroughly with clean water to remove any leftover cleaning solution and loosened mold particles. Pay close attention to your bathroom’s ceiling texture, as some surfaces absorb moisture more easily.
To rinse effectively without damaging delicate textures, try these tips:
- Use a spray bottle or a damp sponge for gentle rinsing
- Avoid over-saturating the ceiling to prevent water damage
- Rinse in small sections to ensure all cleaning residue is removed
- Gently blot with a microfiber cloth to absorb excess moisture
Next, dry the ceiling completely to stop mold from returning. Proper moisture control is key here. Use fans or open windows to speed up drying.
Avoid leaving any damp spots, especially in textured areas where moisture can linger. By rinsing and drying thoroughly, you’ll create a clean, mold-free surface ready for the next steps in your bathroom care.
Prevent Mold on Your Bathroom Ceiling With Ventilation and Maintenance
After rinsing and drying your bathroom ceiling thoroughly, the next step is to focus on preventing mold from coming back. Proper ventilation plays a vital role in controlling moisture, which is mold’s main enemy. Make sure to use an exhaust fan during and after showers to improve air circulation and reduce humidity.
If your bathroom lacks a fan, consider installing one or at least open a window to let fresh air in and moisture out.
Regular maintenance also helps keep mold at bay. Check for leaks around pipes and fixtures that might increase moisture levels. Wipe down wet surfaces and keep towels and bath mats dry.
Using a dehumidifier can further boost moisture control, especially in bathrooms with poor air circulation. By consistently managing humidity and ensuring good airflow, you’ll create an environment where mold struggles to grow, keeping your bathroom ceiling clean and mold-free for the long term.
Frequently Asked Questions
Can Mold on the Ceiling Cause Health Problems?
Yes, mold on the ceiling can cause health problems. You might experience mold toxicity, which can lead to symptoms like headaches, fatigue, and dizziness.
Mold also poses respiratory risks, especially if you have allergies or asthma, causing coughing, wheezing, or difficulty breathing. It’s important you address mold growth promptly to protect your health. Ignoring it can worsen these issues and make your living environment unsafe.
How Often Should I Check for Mold in My Bathroom?
You should check for mold in your bathroom at least once a month. Regular inspections help you catch mold early before it spreads.
Focus on moisture control by fixing leaks and using a dehumidifier if needed. Improve ventilation by running exhaust fans during and after showers to reduce humidity.
These ventilation tips and moisture control habits will keep your bathroom mold-free and healthier for you and your family.
Are There Professional Mold Removal Services Available?
Mold often acts like an unwelcome shadow in your home, but you don’t have to face it alone. Yes, there are professional mold remediation services ready to help.
They conduct a thorough professional inspection to identify hidden mold and prevent it from coming back. By trusting experts, you guarantee a safer, healthier space, freeing you from the constant battle against that stubborn, creeping mold.
What Types of Mold Are Most Common in Bathrooms?
The most common types of mold in bathrooms are black mold (Stachybotrys), Aspergillus, and Cladosporium. You’ll want to focus on mold prevention by improving bathroom ventilation since moisture buildup encourages mold growth.
Using exhaust fans and opening windows helps keep the air dry, reducing the chances mold spores take hold. If you catch mold early, you can clean it up easily and keep your bathroom healthier.
Can Painting Over Mold Prevent It From Returning?
You wouldn’t just slap a fresh coat of paint on a leaky roof and expect no drips, right? The same goes for mold. Painting over mold won’t stop it from coming back unless you use mold resistant paint and fix the root cause, like improving ceiling ventilation.
Without good airflow, moisture stays trapped, feeding mold. So, clean the mold first, then apply mold resistant paint, and boost ventilation to keep your bathroom mold-free.
Conclusion
By battling bathroom blemishes with these simple steps, you’ll banish bothersome black mold and bring back bright, beautiful ceilings. Remember, regular rinsing and robust ventilation are your best bets to block mold’s messy makeup.
Stay steady with your scrub and safety routine, and soon you’ll savor a sparkling, spotless space. Keep cleaning consistent, and your ceiling will stay clean, clear, and charming.
Making your bathroom a breezy, bright, and beautiful haven starts with knowing how to clean mold off your bathroom ceiling.