10 Steps to Successfully Remodel Your Shower
Remodeling your shower can feel overwhelming, especially when you’re unsure where to start or how to avoid costly mistakes. You’re not alone—many people struggle with finding the right design, materials, and installation process that will stand the test of time.
To successfully remodel your shower, start by evaluating your bathroom layout and setting a realistic budget that includes materials, labor, and contingencies.
Choose a shower design that fits your space and style while selecting durable, water-resistant materials and fixtures.
Properly install waterproofing and drainage, then build and tile your shower walls and floor.
Finish with doors, shelves, and lighting tailored for both function and look.
Keep up regular maintenance to guarantee long-term performance.
Investigate these steps further for expert tips and insights.
Key Takeaways
- Assess your bathroom layout and plumbing to plan a functional and cost-effective shower remodel.
- Choose durable, water-resistant materials like mold-resistant tiles and waterproof membranes for longevity.
- Install proper waterproofing and drainage systems to prevent leaks and water damage.
- Select shower doors, shelves, and lighting that balance style, space, and functionality.
- Maintain ventilation and clean regularly to extend your shower’s lifespan and prevent mold growth.
Assess Your Bathroom Layout Before Remodeling
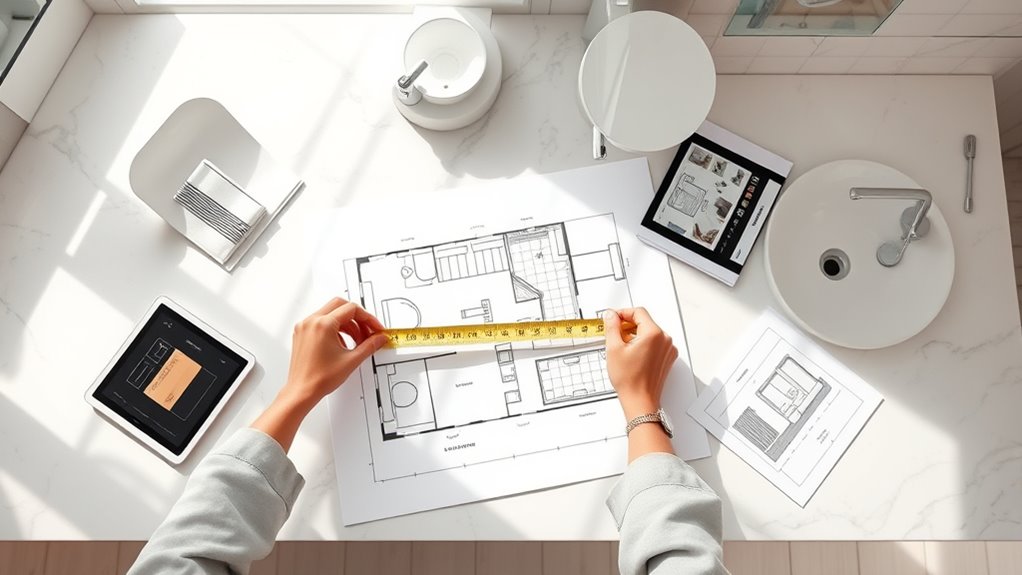
Before you jump into remodeling, assess your bathroom layout carefully. Start by measuring the space and noting the positions of existing fixtures. This helps you determine if your current layout supports the changes you want.
Begin your remodel by measuring your bathroom and noting fixture placement to ensure your layout supports your plans.
Pay special attention to plumbing considerations, as moving pipes can be costly and complicated. Understanding where water lines and drains are located will save you headaches later.
Also, don’t overlook bathroom ventilation. Proper ventilation prevents mold and moisture damage, so check if your current system is adequate or if it needs upgrading.
If you plan to enlarge your shower or add features like a steam unit, ventilation becomes even more critical. You’ll want to guarantee the exhaust fan is powerful enough to handle the increased humidity.
Taking these steps assures your remodel is practical and efficient, avoiding surprises that could delay your project or inflate costs. Careful planning upfront makes your shower remodel smoother and more successful.
Set a Realistic Budget for Your Shower Remodel
Once you understand your bathroom’s layout and ventilation needs, it’s time to figure out how much your shower remodel will cost. Effective budget planning is essential to avoid surprises and keep your project on track.
Start by researching materials, fixtures, and labor costs in your area to create a detailed cost estimation. Don’t forget to include expenses like plumbing upgrades, permits, and any unexpected repairs that might arise once work begins.
Setting a realistic budget means prioritizing what matters most to you, whether it’s high-quality tiles or efficient water-saving fixtures. Also, build in a contingency fund, typically 10-15% of your total budget, to cover unforeseen costs.
Choose the Right Shower Design and Style for Your Space
Although selecting a shower design might seem overwhelming, focusing on your space’s layout and your personal style will guide you to the perfect choice. Start by evaluating how much room you have and what features you want. For example, consider:
- Space-saving options like corner showers or walk-ins to maximize your bathroom footprint.
- Style preferences, whether you lean toward a sleek modern look or a cozy, traditional feel. Think glass doors versus a classic shower curtain.
- Water conservation features such as low-flow showerheads to reduce water use without sacrificing comfort.
Choosing between a shower curtain and glass enclosure can also impact the overall vibe and practicality. Curtains often add a softer, customizable touch, while glass offers a clean, open feel. Keep your daily routine and maintenance in mind when selecting your design. By balancing these factors, you’ll create a shower that’s both stylish and functional for your space.
Select Durable, Water-Resistant Materials for Your Shower
When you’re remodeling your shower, you’ll want to pick materials that can handle constant moisture without falling apart. Think about options like porcelain tile, natural stone, or acrylic panels—they’re durable and water-resistant. Picking the right materials means your shower will stay beautiful and work well for years to come.
Best Water-Resistant Materials
Choosing the right materials for your shower guarantees it stays durable and water-resistant over time. To make sure your shower stands up to moisture, focus on these top water-resistant materials:
- Mold-resistant tiles: These tiles prevent mold growth and resist water absorption, making them ideal for shower walls and floors.
- Waterproof paint: Use this on ceilings or areas prone to splashes to add an extra moisture barrier without compromising style.
- Acrylic panels: These smooth, non-porous surfaces repel water and are easy to clean, reducing the risk of leaks and mildew.
Durable Options for Showers
Since your shower faces constant exposure to water and humidity, you’ll need materials that not only resist moisture but also withstand daily wear and tear. Choosing durable options like porcelain tile, natural stone, or acrylic panels guarantees your shower stays intact and looks great over time.
Don’t overlook eco-friendly options such as recycled glass tiles or bamboo accents, which offer sustainability without sacrificing style. Pair these materials with customizable fixtures that fit your design and functionality needs perfectly.
Adjustable showerheads, corrosion-resistant handles, and sleek faucets not only improve durability but also enhance your shower experience. By selecting water-resistant, long-lasting materials and flexible fixtures, you create a shower space that’s both resilient and tailored to your personal taste.
Choose Shower Fixtures and Hardware That Fit Your Style and Needs
Although selecting shower fixtures might seem straightforward, it’s essential to take into account both your personal style and daily needs. This helps create a space that’s functional and visually appealing. Shower fixture selection goes beyond looks; you also need to guarantee hardware compatibility with your plumbing and shower design.
To make the best choices, consider these factors:
- Functionality: Decide whether you want a fixed showerhead, handheld, or dual system for flexibility and ease of use.
- Style: Choose finishes and designs that complement your bathroom’s aesthetic, from modern chrome to rustic bronze.
- Durability: Look for materials resistant to corrosion and easy to clean, ensuring long-lasting performance.
Demolish and Clear Out Your Old Shower Area
Before you can install your new shower, you’ll need to demolish and clear out the old one carefully. Start by shutting off the water supply and confirming plumbing disconnection to avoid leaks.
Next, focus on old tile removal. Use a hammer and chisel to break tiles without damaging the wall behind. Remove all debris to create a clean workspace. Be cautious around plumbing fixtures to prevent damage.
| Task | Tools Needed | Tips |
|---|---|---|
| Plumbing disconnection | Wrench, pliers | Turn off main water first |
| Old tile removal | Hammer, chisel | Work slowly to protect walls |
| Debris removal | Gloves, trash bags | Dispose of debris safely |
| Inspect area | Flashlight | Check for mold or damage |
Following these steps guarantees a smooth transition to your new shower installation.
Install Shower Waterproofing and Drainage Systems
Now that your old shower is cleared out, it’s time to focus on waterproofing and drainage. You’ll want to pick materials that keep moisture out and install a drainage system that prevents any water buildup.
Getting these steps right is key because it guarantees your shower stays dry and damage-free. Plus, a good waterproofing job means less worry about mold or leaks down the line. So, take your time and make sure everything is sealed up tight before moving on.
Choosing Waterproofing Materials
How do you guarantee your shower stays dry and damage-free for years? Choosing the right waterproofing materials is essential. Start by understanding the best waterproofing techniques and moisture barriers suited for your space.
Here’s what to consider:
- Waterproof Membranes: Look for durable, flexible membranes that create a seamless barrier against moisture.
- Liquid Waterproofing: This technique allows you to apply a paint-on moisture barrier that adapts to every corner, ensuring full coverage.
- Sheet Waterproofing: Prefabricated sheets offer consistent thickness and protection, perfect for shower walls and floors.
Selecting these materials carefully ensures your shower resists leaks and mold. Focus on quality waterproofing techniques and moisture barriers to protect your remodel investment effectively.
Proper Drainage Installation
Why does proper drainage matter so much in your shower remodel? Because without it, water can pool, causing leaks and damage. When you install shower waterproofing and drainage systems, focus on precise pipe installation to guarantee water flows smoothly.
Position pipes at the correct slope to prevent clogs and backflow. During installation, check connections carefully to avoid leaks later. If you encounter issues, don’t ignore drainage troubleshooting. It’s key to spotting blockages or poor alignment early.
Proper drainage protects your investment by keeping water where it belongs, preventing costly repairs. So, take time to install the drainage system right the first time, combining effective waterproofing with well-planned pipe installation for a durable, worry-free shower remodel.
Build and Tile Your Shower Walls and Floor
Before you start tiling, make sure your shower walls and floor are properly framed and waterproofed to prevent future damage. This foundation is essential for a long-lasting shower.
Next, choose your shower wall textures carefully. Smooth tiles create a sleek look, while textured tiles add depth and grip. For the floor, decide on floor tile patterns that combine style and safety, like small mosaic tiles for better traction.
Here’s how to build and tile your shower:
- Install cement backer boards on the framed walls and floor for a sturdy, moisture-resistant base.
- Apply a waterproof membrane over the backer boards to seal the area completely.
- Begin tiling from the bottom up, using spacers to maintain even grout lines and following your chosen shower wall textures and floor tile patterns.
Stay precise with measurements and use the right adhesive to guarantee your new shower looks great and functions well.
Add Shower Doors, Shelves, and Lighting Finishes
Now that your shower walls and floor are ready, it’s time to pick the right doors, shelves, and lighting finishes. You’ll want to choose door styles that fit your space and decide where shelves should go for easy access.
And don’t forget to plan lighting that brightens the shower without creating harsh shadows. It’s all about making the space both functional and inviting.
Choosing Shower Door Styles
How do you pick the perfect shower door style to complement your bathroom remodel? Start by exploring various glass styles like clear, frosted, or textured to match your privacy needs and aesthetic. Then, think about the door installation type that suits your space and usage.
Here’s a quick guide:
- Sliding doors save space and work well in smaller bathrooms.
- Hinged doors provide a classic look and swing open wide.
- Bi-fold doors combine functionality and style for compact areas.
Each option impacts how your shower feels and functions. Focus on high-quality materials and precise door installation to ensure durability and smooth operation. Choosing the right shower door style enhances both your bathroom’s look and your daily routine.
Lighting and Shelf Placement
After selecting the perfect shower door style, turn your attention to lighting and shelf placement to improve both function and ambiance. Incorporate ambient lighting to create a relaxing atmosphere while ensuring enough brightness for safety.
Position shelves thoughtfully to keep essentials within easy reach without overcrowding the space. Consider built-in niches or corner shelves for a sleek look.
| Feature | Placement Suggestion | Benefit |
|---|---|---|
| Ambient Lighting | Ceiling or wall-mounted | Soft, even light |
| Built-in Niche | Mid-height wall | Easy access, minimal space |
| Corner Shelf | Shower corners | Maximizes unused space |
| LED Strip Lights | Under shelves or edges | Highlights design |
| Towel Hooks | Near door or outside wall | Convenience |
Proper lighting and shelf placement improve your shower’s style and usability.
Inspect and Maintain Your New Shower for Longevity
Although installing a new shower marks a significant upgrade, you’ll need to regularly inspect and maintain it to keep it functioning smoothly. Establishing consistent cleaning routines is essential to prevent grime buildup and mold growth, which can damage your shower over time.
Here’s how you can guarantee your new shower stays in top shape:
- Check for leaks and cracks: Inspect seals around doors, tiles, and fixtures to catch any damage early before it worsens.
- Maintain proper ventilation: Use exhaust fans or open windows to reduce moisture, a key factor in mold prevention.
- Clean regularly: Wipe down surfaces and scrub grout weekly using non-abrasive cleaners to avoid mold and mildew.
Frequently Asked Questions
How Long Does a Typical Shower Remodel Take From Start to Finish?
A typical shower remodel takes about one to two weeks from start to finish, depending on the project’s complexity. If you’re tackling DIY projects, expect it to take a bit longer since you might need extra time for learning and troubleshooting.
Budget planning plays a huge role too. Sticking to your budget can speed things up by preventing delays caused by unexpected expenses. Stay organized, and you’ll get your new shower ready faster than you think!
What Permits Are Required for a Shower Remodel in My Area?
You know what they say: better safe than sorry. For your shower remodel, you’ll need to check local building codes to see which permits apply. Usually, that means a plumbing permit and possibly a building permit.
Permit processes vary by area, so contact your city’s building department or visit their website. Getting these permits guarantees your remodel meets safety standards and helps you avoid costly fines down the road. Don’t skip this essential step!
Can I Remodel My Shower Myself, or Should I Hire a Professional?
You can remodel your shower yourself, but beware of common DIY pitfalls like improper waterproofing or plumbing errors that lead to costly damage. Hiring a professional offers advantages such as expert craftsmanship, code compliance, and efficient project management.
If you’re confident in your skills and have the time, DIY might work, but professionals guarantee a durable, safe result. Weigh your experience and budget before deciding to tackle the remodel on your own.
How Do I Prevent Mold Growth During and After the Remodel?
Did you know that 70% of home mold issues come from bathrooms? To prevent mold during and after your remodel, focus on ventilation improvements like installing exhaust fans to reduce humidity.
Use moisture barriers behind tiles and walls to block water penetration. Keep the area dry and well-ventilated, and choose mold-resistant materials.
These steps will help you avoid costly mold problems and keep your shower fresh and safe.
What Are the Latest Shower Technology Trends to Consider?
You should look into smart fixtures that let you control water temperature and flow with your voice or phone. They make your shower experience both convenient and customizable.
Also, consider eco-friendly materials like recycled tiles and water-saving showerheads to reduce your environmental impact. These trends not only upgrade your bathroom’s style but help you save energy and water.
Embracing smart and sustainable options keeps your remodel modern and efficient.
Conclusion
By following these steps, you’ll transform your shower into a sleek, inviting oasis where water dances seamlessly down tiled walls and soft light glows just right. Imagine stepping into your refreshed space each morning, feeling the cool, smooth surfaces beneath your fingertips and the calming sound of water flowing perfectly.
With careful planning and quality materials, your shower remodel won’t just look stunning. It’ll offer comfort and durability for years to come, making your shower remodel a truly rewarding experience.